Mode Switching
Two buttons and a list are all you need for a menu. Button A moves forward, button B moves back,
and the % (modulo) operator wraps the index around automatically so the list loops from the last
entry back to the first with no extra if checks.
This is a small lab with a big payoff: every menu in the rest of the kit is this exact pattern with a different list.
The Modulo Trick
mode_index = (mode_index + 1) % len(MODES)   # forward, wraps to 0
mode_index = (mode_index - 1) % len(MODES)   # back, wraps to the end
MicroPython's % returns a non-negative result for a positive divisor, so -1 % 5 is 4 — which
means going backward off the front of the list lands you neatly on the last entry. No special case
required.
| Expression | With len(MODES) == 5 |
|---|---|
(4 + 1) % 5 |
0 — wrapped forward |
(0 - 1) % 5 |
4 — wrapped back |
A List of (name, function) Pairs
The other idea in this lab is storing functions in a tuple alongside their names. A function is just a value in Python, so it can sit in a list exactly like a number can.
MODES = (
    ("Rectangle", draw_rectangle),
    ("Circle", draw_circle),
    ("Triangle", draw_triangle),
    ("Lines", draw_lines),
    ("Ring", draw_ring),
)
This Table Grows Into Everything
 Five shapes today, seven emotions in a few labs, and eventually a whole table of numbers that describes my entire emotional range. The shape of the code never changes — only what is in the list.
The Mode Name Moves to the Big Font
Every position in this lab is the 1.2" kit's number times 1.5 — except the font, because bitmap
glyphs are fixed 8×16 and 16×32 shapes that don't get bigger just because the screen did. Left in
the small font, the mode name would cover a smaller fraction of this screen than it did on the
1.2" kit, so it moves up to the 16×32 font here — the same promotion this kit's face.label()
makes for emotion names:
"Rectangle" is the longest mode name at 9 characters, which comes to 144 px in the big font —
comfortably inside the roughly 191 px the visible circle gives you at LABEL_Y. Unlike the
Expression Menu lab, where the label had to move off its naive scaled position to clear a raised
eyebrow, LABEL_Y here is simply 28 × 1.5 = 42, because none of these five demo shapes reach
that high on the screen. There's no face to protect, so the naive scale just works.
Sample Program Code
import config
import shapes
from array import array
from utime import sleep

display = config.init_display()
button_a, button_b = config.init_buttons()

WHITE = config.WHITE
BLACK = config.BLACK
NO_FILL = config.NO_FILL
FILL = config.FILL

# A mode name is a title, and a title on a 360 px screen wants the big
# glyphs. The centering math in show_mode() reads FONT.WIDTH rather than
# a hardcoded 8, so it comes out right whichever font this line names --
# which is exactly why you never scale a font width by hand.
FONT = config.BIG_FONT              # config.SMALL_FONT on the smartwatch kit

HALF_WIDTH = config.WIDTH // 2      # 180
HALF_HEIGHT = config.HEIGHT // 2    # 180

LABEL_Y = 42                        # 28 on the smartwatch kit


def draw_rectangle():
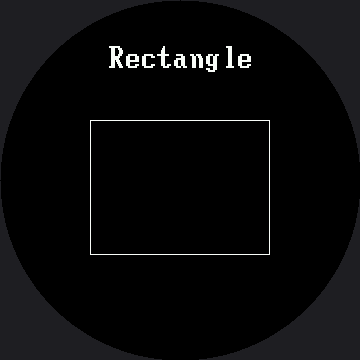
    display.rect(90, 120, 180, 135, WHITE)      # 60, 80, 120, 90


def draw_circle():
    shapes.circle(display, HALF_WIDTH, HALF_HEIGHT, 90, WHITE, NO_FILL)  # 60


def draw_triangle():
    points = array('h', [0, -90, 87, 69, -87, 69])   # 0,-60, 58,46, -58,46
    shapes.poly(display, HALF_WIDTH, HALF_HEIGHT, points, WHITE, NO_FILL)


def draw_lines():
    display.line(75, 105, 285, 270, WHITE)      # 50, 70, 190, 180
    display.line(75, 270, 285, 105, WHITE)      # 50, 180, 190, 70


def draw_ring():
    # The mode a round screen was made for. Thickness 5 here, 3 there --
    # a stroke has to grow with the screen or it thins out visually.
    shapes.ring(display, HALF_WIDTH, HALF_HEIGHT, config.SAFE_RADIUS, WHITE, 5)


MODES = (
    ("Rectangle", draw_rectangle),
    ("Circle", draw_circle),
    ("Triangle", draw_triangle),
    ("Lines", draw_lines),
    ("Ring", draw_ring),
)


def show_mode(index):
    name, draw = MODES[index]
    display.fill(BLACK)
    x = HALF_WIDTH - (len(name) * FONT.WIDTH) // 2
    display.text(FONT, name, x, LABEL_Y, WHITE, BLACK)
    draw()


def pressed(button):
    if button.value() == 1:
        return False
    sleep(0.02)
    return button.value() == 0


def wait_for_release(button):
    while button.value() == 0:
        sleep(0.01)


mode_index = 0
show_mode(mode_index)

while True:
    if pressed(button_a):
        mode_index = (mode_index + 1) % len(MODES)
        show_mode(mode_index)
        wait_for_release(button_a)

    if pressed(button_b):
        mode_index = (mode_index - 1) % len(MODES)
        show_mode(mode_index)
        wait_for_release(button_b)

    sleep(0.01)
Here's the first mode, which is what you see before pressing anything:
When a Full Wipe Is Fine
Every mode here starts with display.fill(BLACK), and you can see it happen when you press a
button. After all the fuss about avoiding full wipes, why is that acceptable?
Because it happens once per press, not sixty times a second. Knowing when a full wipe is fine is exactly as useful as knowing when it is not:
| Situation | Full wipe? |
|---|---|
| A menu that changes when a human presses a button | Yes — a few times a minute is invisible |
| A demo reel changing every two seconds | Yes |
| An animation running at 30 frames per second | No — erase only the box that moved |
| A pupil sweeping back and forth | No |
Which of These Belongs on a Round Screen?
 Step through all five and ask yourself which ones look right and which look like mistakes. The rectangle and the triangle both have corners pointing at a bezel that has none. The ring looks like it was made for this screen, because it was.
Things to Try
- Add a sixth mode. Write the function, add one row to
MODES, and you are done — no changes to the loop at all. Try naming it "Checkerboard": at 12 characters, that's 192 px in the big font, just past the roughly 191 px the visible circle gives you atLABEL_Y— watch its first and last letters vanish under the bezel. - Reorder the list and confirm the menu order follows. Data, not code.
- Time a mode change with
ticks_ms(). Most of what you measure is the full wipe — 129,600 pixels here, 2.25× the 1.2" kit's 57,600 — and it is still comfortably fast enough for a button press. - Delete
wait_for_release()and hold button A down. You will fly through the whole menu several times a second, which is a useful thing to have seen once.
References
- Reading Two Buttons — the button-reading pattern this lab builds on
- The Expression Menu — the same code with seven emotions instead of five shapes
- A Face With a Memory — what happens when the menu gains a memory of where it has been
- Mode Switching on the 1.2" kit — the same lab where the mode name still fits in the small font