Print Failures, Troubleshooting, and Post-Processing
Welcome to Chapter 12
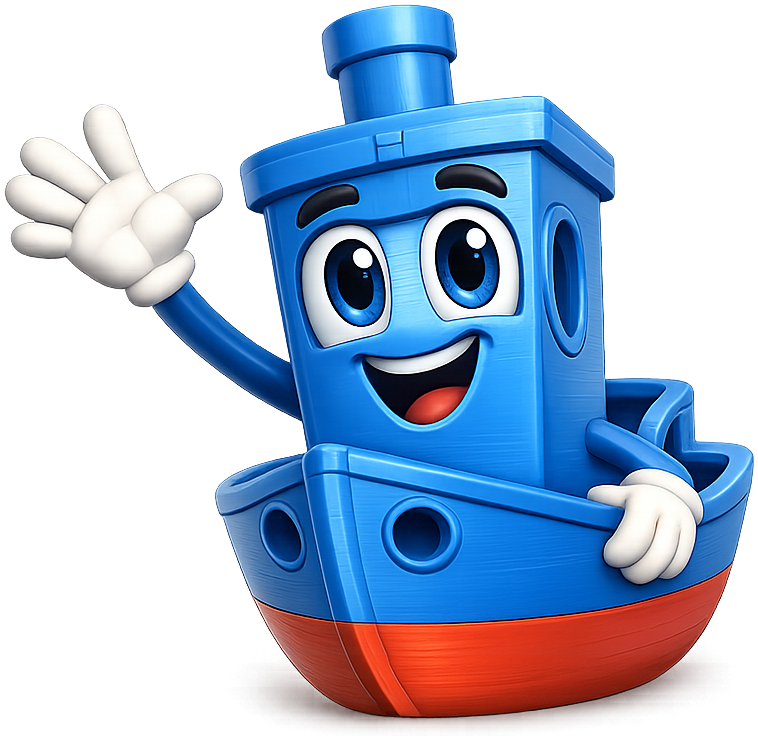 I have been the subject of more troubleshooting sessions than I care to count. My hull reveals warping tendencies, my smokestack tests bridging, my cabin windows test overhang quality, and my deck highlights surface finish. In this chapter you'll learn to read a failed print the way a detective reads a crime scene — every artifact has a cause, and every cause has a fix. By the end, you'll be able to turn a bad print into a lesson rather than just a pile of plastic.
Summary
This chapter teaches a structured troubleshooting workflow and the most common print failure modes (warping, first-layer failures, stringing, under- and over-extrusion, layer separation, elephant's foot, ringing/ghosting, clogged nozzles, failed adhesion, resin-specific failures). It also covers the standard post-processing techniques: support removal, sanding, painting, annealing, chemical smoothing, UV post-curing, and joining printed parts.
Concepts Covered
This chapter covers the following 19 concepts from the learning graph:
- Troubleshooting Workflow (Concept 175)
- Warping (Concept 176)
- First-Layer Failures (Concept 177)
- Stringing (Concept 178)
- Under-Extrusion (Concept 179)
- Over-Extrusion (Concept 180)
- Layer Separation (Concept 181)
- Elephants Foot (Concept 182)
- Ringing And Ghosting (Concept 183)
- Clogged Nozzle (Concept 184)
- Failed Adhesion (Concept 185)
- Resin Print Failures (Concept 186)
- Support Removal (Concept 187)
- Sanding And Finishing (Concept 188)
- Painting And Priming (Concept 189)
- Annealing (Concept 190)
- Chemical Smoothing (Concept 191)
- UV Post-Curing (Concept 192)
- Joining Printed Parts (Concept 193)
Prerequisites
This chapter builds on concepts from:
- Chapter 2: AM Standards, Process Families, and Industrial AM
- Chapter 6: Materials Science for Additive Manufacturing
- Chapter 7: Slicing, G-code, and Toolpaths
- Chapter 8: FDM Printer Hardware and Operation
- Chapter 10: Resin Printing: SLA, MSLA, and DLP
A Troubleshooting Mindset
Before diving into individual failure modes, it's worth establishing a troubleshooting workflow — a systematic approach to diagnosing problems that works whether you're looking at a new symptom or a familiar one. Jumping straight to changing slicer settings without first identifying the root cause often leads to "fixed by accident" situations that you can't reproduce, or worse, to masking one problem while creating another.
A useful troubleshooting workflow for 3D printing follows four steps:
- Observe — look at the failed print carefully. Note exactly what the failure looks like, where it appears (first layer, all layers, specific geometry), and when it started (immediate, partway through, after a filament color change).
- Hypothesize — identify the most likely cause from the symptoms. Most failure modes have a characteristic "signature." The table below helps map symptoms to root causes.
- Test one variable — change one setting, not five simultaneously. If you change temperature, retraction, speed, and bed adhesion at once and the next print succeeds, you don't know which change fixed it.
- Verify — print again and confirm the fix works consistently, not just once.
The habit of testing one variable at a time and verifying results is standard engineering practice — and it's the same mindset you'll use in Chapter 15 when designing experiments and in your capstone project.
FDM Failure Modes
Warping
Warping is the upward curling of a print's corners or edges away from the build surface during printing. It's caused by uneven thermal contraction: the bottom of the print has cooled and contracted while the top is still being deposited and is still hot. The differential shrinkage creates tensile stress that lifts the edges.
Warping is most severe in:
- Materials with high thermal expansion coefficients (ABS, ASA, nylon)
- Large flat prints with minimal infill (more open area for unrestrained shrinkage)
- Cold ambient environments (drafts from doors, windows, HVAC)
The mitigation strategies, in order of effectiveness:
- Heated bed — slows initial cooling and reduces the thermal gradient between the first layer and subsequent layers.
- Enclosure — maintains elevated ambient temperature throughout the print, minimizing differential shrinkage.
- Brim or raft — increases the adhesion footprint so the print has more "grip" on the bed surface.
- Bed adhesive — hairspray, glue stick, or specialized products (Magigoo, BuildTak) on the build surface.
- Material choice — PLA warps far less than ABS; PETG is intermediate.
- Fan speed reduction — for warping-prone materials, reducing or disabling the part cooling fan slows external surface cooling and reduces differential shrinkage.
First-Layer Failures
First-layer failures are the most common cause of abandoned prints. If the first layer doesn't stick or doesn't look right, everything built on top of it will also be wrong. Before diagnosing first-layer issues, revisit bed leveling from Chapter 8 — the majority of first-layer failures trace back to incorrect Z offset (too far or too close) or an un-trammed bed.
First-layer symptoms and their most likely causes:
- Filament not sticking, peeling immediately: Z offset too high; bed surface dirty or incompatible with material.
- Nozzle dragging through plastic, beads of material, or scratching sounds: Z offset too low.
- First layer sticks in center but peels at corners: bed not level (corners too high); or warping due to insufficient bed temperature.
- Gaps between first layer lines: under-extrusion on first layer; first layer extrusion width too narrow in slicer.
- First layer lines merged into a blob: over-extrusion; Z offset too low; first layer printing too slowly with excessive flow.
Stringing
Stringing (also called "hairy prints" in the community) occurs when the nozzle oozes a thin thread of plastic while traveling between print features. The molten plastic in the hotend is under pressure from the extruder; when the nozzle moves without extruding, residual pressure causes it to leak.
The primary fix is retraction: the extruder reverses direction before a travel move, pulling filament backward and relieving pressure in the hotend. Too little retraction = stringing; too much retraction = grinding marks on filament, air in the nozzle, and under-extrusion after the retraction.
Retraction tuning variables:
- Retraction distance: 0.5–2.5 mm for direct drive; 3–7 mm for Bowden (longer tube requires more retraction)
- Retraction speed: 25–45 mm/s typical
- Print temperature: Lower temperature = less liquid material = less ooze. If stringing persists after retraction tuning, try reducing temperature by 5 °C.
- Travel speed: Faster travel moves spend less time oozing; increase travel speed to reduce stringing.
Under-Extrusion and Over-Extrusion
Under-extrusion means the printer is depositing less plastic than the G-code commands. The result: visible gaps between lines, rough surfaces, weak layer bonds, and parts that fail structurally. Common causes:
- Extruder gear slipping (insufficient idler tension)
- Partial nozzle clog
- Print temperature too low for the material or speed
- E-steps miscalibrated (too few steps per mm)
- Print speed too fast for the hotend to melt filament at the required rate
Over-extrusion means too much plastic is being deposited. The result: blobby surfaces, dimensional over-sizing, seams, and "zits" (small blobs where the print head starts and stops). Over-extrusion is less common than under-extrusion but usually traces back to E-steps set too high or an extrusion multiplier above 1.0 in the slicer.
E-Step Calibration Fixes Both
 Before reaching for temperature settings or retraction values to fix extrusion issues, calibrate your E-steps. Mark 100 mm on your filament, command 100 mm of extrusion from the menu, measure how much actually moved. If it's 95 mm, your E-steps are 5% low — dial them up. If it's 105 mm, dial them down. This single calibration step eliminates most under- and over-extrusion problems before they start.
Layer Separation
Layer separation (also called delamination) is where layers don't bond to each other and pull apart as a horizontal fracture. The root cause is inadequate heat: either the print temperature is too low for good inter-layer bonding, the print speed is too fast (not enough time for each bead to fuse to the previous layer), or the cooling fan is too aggressive, chilling layers before they can bond.
Fixes: increase print temperature by 5–10 °C; reduce print speed by 20%; reduce fan speed (especially for ABS and ASA).
Elephant's Foot
Elephant's foot is the slight outward bulge of the first few layers relative to the rest of the part. It happens when the first layer is over-squished (Z offset too low) or over-heated, causing it to spread wider than the design. The result is a part that won't fit in its recess or has inaccurate base dimensions.
Fixes: increase Z offset by small increments (0.05 mm steps) until the first layer no longer bulges; reduce first-layer flow in the slicer (90–95% of normal flow rate for the first few layers).
Ringing and Ghosting
Ringing (also called ghosting or echoing) appears as wavy ripples in the surface of a print, typically radiating outward from sharp corners or walls after a sudden change in print direction. It's caused by the print head's momentum: when the head decelerates sharply, the frame and the loose parts of the motion system oscillate. If the acceleration setting is too aggressive relative to the frame's stiffness, the head is still vibrating while it deposits the next few beads.
Fixes: reduce acceleration in firmware (M201 command) or slicer settings; increase belt tension (loose belts amplify the oscillation); reduce print speed for outer perimeters; use Input Shaping (Klipper feature) to compensate for the resonant frequency.
Clogged Nozzle
A clogged nozzle can range from partial (extrusion is reduced, filament grinding is visible) to complete (no extrusion at all). Causes include:
- Printing too cold for the material
- Debris or carbonized filament in the nozzle
- Heat creep (see Chapter 8 — filament softens above the heat break)
- A foreign object in the filament
The cold pull (atomic pull) technique described in Chapter 8 removes soft partial clogs. For harder clogs, a nozzle needle (0.3 mm acupuncture needle inserted from below while hot) can dislodge debris. If neither works, replace the nozzle — they're inexpensive.
Failed Adhesion
Failed adhesion (print detaches from the bed mid-print) differs from a first-layer failure: the print starts fine and detaches hours into the job. Causes:
- Warping stress overcoming bed adhesion for tall, long prints
- Build surface contamination from fingerprints (oils reduce adhesion)
- Build surface worn out (PEI sheets eventually lose grip; glass loses its roughness)
- Ambient temperature changes during a long print (drafts, AC cycling)
Fixes: clean the bed with IPA before each print; increase brim width; check enclosure if printing warp-prone materials; replace worn build surface.
Diagram: FDM Failure Diagnosis Decision Tree
FDM Failure Mode Diagnosis Decision Tree
Type: workflow
sim-id: fdm-failure-diagnosis
Library: p5.js
Status: Specified
Bloom Level: Evaluate (L5) Bloom Verb: Judge Learning Objective: Students evaluate a described print failure by navigating a decision tree that identifies the most likely root cause and recommended fix.
Visual layout: - Interactive decision tree rendered in p5.js - Root node: "Where does the failure appear?" - Branch categories: First Layer / All Layers / Specific Geometry / After Long Run - Each category branches into symptom nodes (e.g., "Gaps in first layer?", "Lines not bonding?", "Blobs and zits?") - Leaf nodes show: Failure Name, Root Cause (1–2 sentences), Recommended Fix (numbered list), Related Slicer Setting
Interactive elements: - Click any branch node to navigate deeper into the tree; breadcrumb trail at top shows path taken - Each leaf node has a "See Example Photo Description" button — expands a text panel describing what this failure looks like in detail - "Start Over" button resets to root - Hover any node to see the full question/description in a tooltip
Tree data covers: warping, first-layer not sticking, first-layer too squished, stringing, under-extrusion, over-extrusion, layer separation, elephant's foot, ringing/ghosting, clogged nozzle, failed mid-print adhesion
Color coding: - Blue: question/branch nodes - Orange: symptom confirmation nodes - Green: leaf nodes (diagnosis + fix) - Red: safety-related fixes (thermal runaway, nozzle clog fire risk)
Responsive: tree scales to container; on narrow screens, switches from graphical tree to a guided Q&A form.
Resin Print Failures
Resin printing has its own characteristic failure modes, mostly related to the peel mechanism and exposure settings rather than the thermal and extrusion issues of FDM.
Common resin failure modes:
- Print sticks to FEP instead of build platform: Insufficient bottom layer exposure (platform grip is weak); FEP is new and has high adhesion; build platform is dirty or not roughed up. Fix: increase bottom exposure time; lightly sand the build platform with 400-grit sandpaper.
- Layer delamination (print separates mid-model): Normal layer exposure too short; resin temperature too low (cold resin is viscous and doesn't flow well); FEP tension too high or too low. Fix: increase normal exposure by 0.2–0.5 s; warm the resin to 20–25 °C before printing.
- Print detaches mid-print after several layers: Peel forces exceed support strength; too few or too thin supports; model orientation creates large cross-sections that generate high peel force. Fix: add more supports; reorient to reduce maximum cross-section area per layer; use a tilted FEP design (reduces peel force by allowing progressive separation).
- Supports fused to model (can't remove without damage): Over-exposure caused cured resin to bleed into support contact points. Fix: reduce normal exposure; use smaller support tip size; add a thin interface layer ("support contact Z distance" in slicer settings).
- Cloudy or matte surface finish: Residual IPA on part during curing; incomplete wash. Fix: wash thoroughly, air dry completely before curing.
- Dimensional over-sizing on XY: Over-exposure causes resin to cure beyond pixel boundaries (bleed). Fix: reduce normal exposure time; use a calibration test print to find the correct exposure for your resin.
Post-Processing Techniques
The part that comes off the printer is usually the beginning of the finishing process, not the end. Post-processing transforms a raw print into a finished artifact.
Support Removal
Support removal is the first post-processing step for most prints. Good practice:
- For FDM: use flush-cut pliers or diagonal cutters to clip supports at their base; then use needle-nose pliers to peel remaining support material. Avoid twisting supports off by hand — the torque can break fine details near the support contact point.
- For resin: always remove supports after curing (not before — semi-cured parts are brittle and can snap). Use flush cutters; wet-sand the contact marks.
- Design to minimize support scars: place supports on less visible surfaces; use reduced-contact support tips in the slicer.
Sanding and Finishing
Sanding removes layer lines and support marks, creating a smoother surface for painting or functional use. The approach:
- Start with 120–220 grit (removes layer lines and gross marks).
- Progress through 320, 400, 800, 1200, 2000 grit (progressively finer scratches, transitioning from matte to smooth).
- Wet sanding (using water as lubricant) from 600 grit upward reduces dust and produces a finer surface.
- A final pass with 2000–3000 grit produces a surface fine enough for paint without primer on most FDM parts.
Limit sanding on thin walls and fine details — material removal is permanent and can distort toleranced features.
Painting and Priming
Bare FDM-printed parts have porous, rough surfaces that absorb paint unevenly. Priming seals the surface and provides a uniform base for paint adhesion. Options:
- Spray primer (rattle can filler primer, gray or white): fills micro-scratches, adheres well to most plastics, provides good paint adhesion. Apply in thin coats; heavy coats fill sharp details.
- Liquid epoxy primer (XTC-3D, Smooth-On): self-leveling coating that fills layer lines. Apply by brush; it self-levels over small gaps. Produces a smoother result than spray primer but requires mixing and has limited working time.
- Brush-on primer: useful for small areas or models with complex geometry.
After priming, sand lightly with 400–600 grit to knock down any raised nibs or dust inclusions. Then apply paint: spray paint or brush-on acrylic/enamel both work on primed FDM parts. Sealing with a clear coat (matte, satin, or gloss) protects the paint and unifies the finish.
Annealing
Annealing is a heat-treatment process that strengthens FDM parts by allowing the polymer chains in adjacent layers to relax and more fully bond. The part is heated in an oven to just below the glass transition temperature (Tg) of the material — typically 50–60 °C for PLA, 70–80 °C for PETG, 90–100 °C for ABS — and held there for 30–60 minutes, then allowed to cool slowly.
Annealing can increase the tensile strength and impact resistance of FDM parts by 10–25%. The drawback: annealing causes thermal distortion in parts that aren't fully constrained or aren't geometrically symmetric. Flat plates warp; tall narrow features lean. To anneal successfully, support the part in sand or salt to constrain it during the heat cycle.
Chemical Smoothing
Chemical smoothing uses a solvent to dissolve and reflow the outermost layer of the print, eliminating layer lines and producing a nearly injection-molded surface finish. The most effective pairing is acetone vapor smoothing for ABS — acetone is a solvent for ABS; the vapors dissolve the outer surface slightly, which flows and re-solidifies smooth.
The process: place the ABS print on a shelf inside a sealed container; add a small amount of acetone to an absorbent material (paper towels) at the bottom; seal and wait 5–30 minutes depending on the desired effect. The part absorbs acetone vapor and the outer surface self-levels. Allow full off-gassing (12–24 hours) before use.
Important safety notes: acetone is highly flammable and narcotic in high concentrations. Chemical smoothing must be done outdoors or in a very well-ventilated space, far from ignition sources, with gloves and eye protection.
Note: PLA cannot be chemically smoothed with acetone. EtOH (ethanol) has limited effect; tetrahydrofuran (THF) can dissolve PLA but is highly toxic and not recommended for school use. Mechanical finishing (sanding + priming) is the practical smoothing route for PLA.
UV Post-Curing
As covered in Chapter 10, UV post-curing completes the polymerization of resin prints. The post-cure step does several things: it hardens the part to full mechanical properties, it cures any residual surface tackiness, and it stabilizes color (some resins shift dramatically with under-cure vs. over-cure).
Cure time depends on resin type and UV station power. Most standard resins are fully cured in 2–8 minutes in a dedicated UV station. Engineering resins (dental, castable) may require longer cure cycles at specific temperatures. Check the resin manufacturer's data sheet for exact cure times — overcuring can embrittle some resin formulations.
Joining Printed Parts
Most useful objects exceed the build volume of any single printer. Joining printed parts extends what you can make. Methods available:
- Mechanical fasteners — design for M3/M4 screws with printed bosses or heat-set inserts. Heat-set brass threaded inserts pressed into slightly undersized holes (with a soldering iron) provide strong, reusable threads in thermoplastic parts.
- Adhesives — cyanoacrylate (super glue) bonds most FDM plastics quickly but with low impact resistance; epoxy provides higher strength and some gap-filling; for ABS-to-ABS, acetone dissolved with ABS scraps makes an excellent "plastic weld" adhesive that fuses the parts chemically.
- Snap fits — design integral snap-fit features (cantilever arms that deflect during assembly and lock in place) in CAD; these allow tool-free, reversible assembly and are one of AM's most powerful assembly features.
- Press fits — shaft-in-hole interference fits for non-removable joints; tolerances as discussed in Chapter 11.
- Fusion welding — drag a hot (200–220 °C) soldering iron tip along a joint seam with filament acting as filler rod; produces a mechanical bond between parts.
Post-Processing Is Where Patience Pays Off
 Sanding through 120→220→400→800→1200 grit feels tedious. It is tedious. But every grit step is removing the scratches left by the previous one — skip a step and you'll see it in the final finish. The students who take the time to work through the full sanding sequence consistently produce pieces that look painted, professional, and completed. That's not luck; it's the investment of about forty minutes of patient work.
Putting It Together: Diagnosing a Real Failed Print
Here's an exercise: a student prints a 20 mm calibration cube in PLA on a Cartesian printer, and the result has these characteristics:
- Bottom surface peels up on two opposite corners
- Sides show visible layer lines with one section where lines appear fused together into a blob
- Top surface has fine wispy strings across gaps
- Dimensions are X: 19.6 mm, Y: 19.7 mm, Z: 19.9 mm
Let's work through the troubleshooting workflow:
- Observe: corner lifting = warping/adhesion; blob on one side = possible over-extrusion or temperature spike; strings on top = stringing; X/Y under-sized by ~0.3 mm = systematic under-sizing.
- Hypothesize: (1) Bed temperature slightly low or surface dirty (warping); (2) print temperature may have increased mid-print from a thermal fluctuation or the hot end cycling on and over-shooting (blob); (3) retraction needs tuning (stringing); (4) E-steps or extrusion multiplier slightly low (under-sizing).
- Test one variable first: The most impactful fix is usually bed adhesion and E-step calibration. Clean the bed, increase bed temperature 5 °C, verify E-steps, then reprint.
- Verify: Next print shows flat corners, X/Y at 19.95+ mm, reduced stringing. Remaining stringing addressed next iteration by reducing retraction distance or temperature.
Key Takeaways
- A structured troubleshooting workflow (observe → hypothesize → test one variable → verify) is more effective than guessing or changing multiple settings at once.
- Warping results from differential thermal contraction; heated bed, enclosure, and brim are the primary fixes.
- First-layer failures mostly trace back to Z offset and bed leveling — solve those before adjusting slicer settings.
- Stringing is controlled by retraction distance and speed, print temperature, and travel speed.
- Under-extrusion can result from clogs, incorrect temperature, too-fast printing, or miscalibrated E-steps; always calibrate E-steps before other diagnosis.
- Elephant's foot on FDM is fixed by adjusting Z offset and first-layer flow; on resin it's fixed by reducing bottom exposure time.
- Ringing/ghosting is a motion system resonance issue; fix with reduced acceleration, increased belt tension, or Input Shaping.
- Resin failures are primarily peel-related (support strategy, orientation) or exposure-related (over-/under-cure).
- Post-processing stages — support removal, sanding, priming, painting, annealing, chemical smoothing, UV curing — each have specific techniques and material requirements.
- Joining methods include adhesives, mechanical fasteners, heat-set inserts, snap fits, press fits, and fusion welding — the right choice depends on required strength, reversibility, and material.
Check Your Understanding: A Print Looks Great for the First 20 Layers, Then the Corners Begin to Lift. What Is the Most Likely Cause? — Click to Reveal
This is a classic warping signature. The print adheres well initially (the heated bed prevents immediate lifting) but as the part gains height, accumulated differential thermal contraction between the cooled lower layers and the still-hot upper layers builds enough stress to lift the corners away from the build surface. Solutions include increasing bed temperature, adding a brim, reducing fan speed (for ABS), or enclosing the printer to maintain a warm ambient environment throughout the print.
You Can Diagnose and Finish a Print
 Troubleshooting is the skill that separates a person who can follow a recipe from a person who understands the process. You now have both: the systematic workflow to diagnose any failure, and the post-processing toolkit to finish what comes out well. Chapter 13 moves us forward in time to modern printer hardware — the machines that have raised the bar for what a consumer 3D printer can do.