File Management, Packages, and Remote Access on the Pi 500+
Summary
This chapter continues the Linux skills needed to administer a Pi 500+ classroom computer. It covers file operations (making directories, copying, moving, and removing files, editing with Nano), installing and updating software with the APT package manager, and basic process management. It then covers remote access -- SSH for remote login, VNC for remote desktop, and local network discovery by hostname -- along with shell scripting, cron jobs, and environment variables for automating routine tasks. Students finishing this chapter will be able to install software, manage files from the command line, and remotely access a Pi 500+ over SSH or VNC.
Concepts Covered
This chapter covers the following 22 concepts from the learning graph:
- Make Directory Command
- Copy File Command
- Move File Command
- Remove File Command
- Nano Text Editor
- Package Manager
- APT Package Manager
- Install Package Command
- Update System Command
- Process Management
- Task Manager
- Environment Variable
- Shell Script
- Cron Job
- SSH Protocol
- Remote Login
- VNC Remote Desktop
- Local Network Discovery
- Hostname
- System Configuration Tool
- Software Update
- Multi Application Multitasking
Prerequisites
This chapter builds on concepts from:
- Chapter 1: Computational Thinking and Debugging for Physical Computing
- Chapter 10: Wireless Communication with the Pico W
- Chapter 11: Booting, the Desktop, and the Linux Terminal on the Pi 500+
Let's Get Your Workshop Organized!
 You can boot the Pi 500+, open a terminal, and find your way around — now let's put that terminal to real work. This chapter covers everything a working maker needs day to day: managing files, installing new tools, automating boring tasks, and reaching your Pi 500+ from clear across the room. Let's build something!
Chapter 11 gave you the vocabulary to move around a Linux computer — directories, permissions, the shell prompt. This chapter turns that vocabulary into daily habits. You'll create, copy, and remove files without touching the mouse; install new software with a single command instead of hunting for a download link; automate a task so it runs on its own schedule; and connect to your Pi 500+ from a completely different computer on the network. Every one of these skills carries forward into every remaining Linux and Raspberry Pi 5 chapter in this book.
Managing Files from the Command Line
The file manager from the last chapter works fine for occasional clicking around, but real Linux work usually happens faster and more precisely from the terminal. Four commands cover almost everything you'll do to files day to day. The make directory command, mkdir, creates a new, empty directory at the given location. The copy file command, cp, duplicates a file, leaving the original in place and creating a second, independent copy at the destination. The move file command, mv, relocates a file to a new location — or, used within the same directory, renames it — without leaving a copy behind. The remove file command, rm, permanently deletes a file.
Creating and editing text files from the terminal usually means reaching for the Nano text editor, a simple, beginner-friendly text editor built into Raspberry Pi OS that runs right inside the terminal window, with its most common commands listed along the bottom of the screen so you're never guessing how to save or exit.
The example below creates a folder, writes a short note into it with Nano, makes a backup copy, renames the original, and then removes the now-unneeded backup.
$ mkdir photos
$ nano photos/notes.txt
$ cp photos/notes.txt photos/notes-backup.txt
$ mv photos/notes.txt photos/notes-final.txt
$ rm photos/notes-backup.txt
Before the diagram below, notice the shape of the pattern: mkdir creates, cp duplicates, mv relocates or renames, and rm deletes — four verbs that cover nearly everything you'll ever need to do to a file without opening a graphical window at all.
Diagram: File Operations Playground
Run the File Operations Playground MicroSim fullscreen
File Operations Playground (MicroSim)
Type: microsim
sim-id: file-operations-playground
Library: p5.js
Status: Specified
Learning objective: Students will apply (Bloom L3: Apply) mkdir, cp, mv, and rm commands to predict how a virtual file tree changes after each command.
Canvas: 700x460px, responsive — recompute the file-tree panel and command-log panel widths as fractions of width inside windowResized(), stacking them vertically below 520px wide.
Layout: left panel shows a small virtual file tree (starting with /home/pi/ containing photos/ and one file, robot_control.py), rendered as indented labeled boxes. Right panel is a scrolling command log showing commands run so far and their effect in plain language.
Controls: four createButton() controls labeled "mkdir," "cp," "mv," "rm," each opening a small inline form (via createInput()) asking for the relevant file/folder name(s) before applying the operation; a createButton() labeled "Reset Tree" restoring the starting file tree.
Interaction: clicking a command button and filling in the requested name(s) updates the virtual file tree panel immediately — mkdir adds a new folder box, cp adds a duplicate file box, mv moves or relabels a box, rm removes a box entirely (with a brief red flash before it disappears, reinforcing that the action is permanent) — and appends a one-line plain-language description to the command log (e.g., "cp copied notes.txt to notes-backup.txt — the original still exists"). Clicking any existing box in the file tree shows its current full path in a small tooltip.
Implementation: p5.js. Represent the file tree as a nested JavaScript object rebuilt and redrawn each time a command is applied. Form input parsed on a button-triggered callback rather than every keystroke. Store the command log as an array of strings, capped at the most recent 8 entries, rendered with text() inside the log panel.
Berry's Gentle Warning
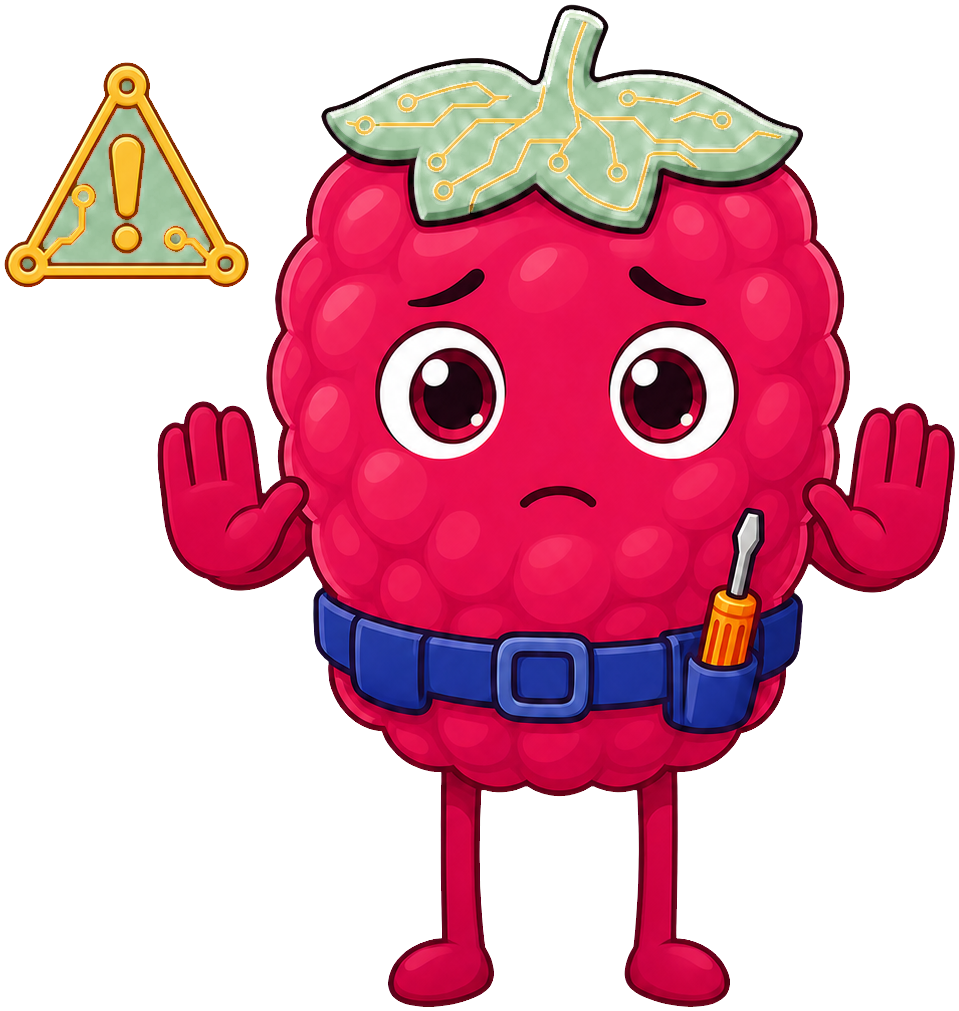
rm does not send a file to a trash bin — it deletes it immediately and permanently, with no confirmation and no undo. Before running rm (especially rm -r, which removes an entire directory and everything inside it), read the exact path you typed one more time. This is one of the few places in this book where a small typo can cost you real work, so slow down and double-check it every time.
Installing and Updating Software
Raspberry Pi OS ships with a useful set of programs already installed, but every real project eventually needs something extra — a library, a tool, a driver. A package manager is a program that automates finding, installing, updating, and removing software, tracking which versions are installed and what each one depends on, so you never have to hunt down installer files by hand. Raspberry Pi OS uses a specific one: the APT package manager (Advanced Package Tool), the standard package manager for Debian-based Linux systems, which Raspberry Pi OS is built on.
Berry's Key Insight
 A package manager is abstraction from Chapter 1, doing real work for you: it hides the messy details of finding a correct download, checking compatibility, and installing files in the right places, and lets you think about software in terms of a single name to install instead.
Two APT commands cover most day-to-day software management. The update system command refreshes APT's local list of what software versions are currently available from its remote repositories — it doesn't install anything by itself, it just checks what's new. The install package command actually downloads and installs a specific named package. Running both together, as shown below, is standard practice before installing anything new, so you're always installing against the latest available information.
sudo apt update refreshes the list of available package versions. sudo apt upgrade then installs newer versions of packages you already have, using that refreshed list — this is what a software update looks like in practice on Linux, the general act of replacing an installed program with a newer version that usually fixes bugs or security issues. Finally, sudo apt install python3-pip installs a brand-new package, python3-pip, that wasn't on the system before. All three commands need sudo, since installing or updating system-wide software is a restricted operation, just like the chown example from the previous chapter.
Diagram: APT Package Manager Workflow
Run the APT Package Manager Workflow MicroSim fullscreen
APT Package Manager Workflow (workflow diagram)
Type: workflow-diagram
sim-id: apt-package-manager-workflow
Library: p5.js
Template: https://github.com/dmccreary/data-science-course/tree/main/docs/sims/package-manager-workflow
Status: Specified
Learning objective: Students will explain (Bloom L2: Understand) the sequence of steps APT follows to update its package list and install or upgrade software.
Canvas: 700x420px, responsive — recompute node positions as fractions of width/height inside windowResized().
Layout: four connected boxes in sequence: "Remote APT repositories" → "sudo apt update (refreshes local package list)" → "sudo apt upgrade (installs newer versions of existing packages)" and, branching separately from the same "local package list" box, "sudo apt install #C2185B for the two commands that only read from repositories (update) and copper gold #D4AF37 for the two that change the installed system (upgrade, install).
Controls: a createSelect() dropdown labeled "Scenario" with two options, "Upgrading existing software" and "Installing python3-pip," each highlighting the matching path through the diagram.
Interaction: clicking any box opens an infobox with a one-sentence explanation matching the chapter's prose. Clicking "Remote APT repositories" explains that this is where package version information actually lives, off of the Pi 500+ itself. A small always-visible caption notes "apt update never installs software by itself — it only refreshes information."
Implementation: p5.js. Store boxes and their connections as a small array of {label, x, y, color, definition} objects with explicit from/to connection pairs, redrawn with arrows each frame. Rectangle-based hit-testing in mousePressed() for click interactions.
Berry's Tip
 Get in the habit of running
 sudo apt update before sudo apt install on any Pi you haven't used in a while. Installing against a stale package list is a classic way to end up chasing a bug that a fresh package list would have avoided entirely.
Keeping Track of Running Programs
Unlike a Pico, which only ever runs one program, a Pi 500+ routinely runs dozens of programs simultaneously — a web browser, a code editor, background system services, and whatever you just launched, all at once. Multi application multitasking is this ability of an operating system to run several programs concurrently, rapidly switching the processor's attention between them so it feels like they're all running at the same time. The operating system's job of starting, tracking, scheduling, and eventually stopping every one of those running programs is called process management — each running program is a process, and the operating system decides how much processor time each one gets.
Multitasking is what makes a Pi 500+ practical as a classroom computer rather than just a bigger Pico. A student can have a code editor open, a terminal running a robot's control script, and a web browser open to reference documentation, all at the same time, switching between them with a click instead of stopping one program to start another. That same multitasking is also what makes it possible to run a long shell script in the background while continuing to use the desktop for something else entirely — a pattern you'll rely on constantly once cron jobs enter the picture later in this chapter.
Most of the time this all happens invisibly, but sometimes you need to actually look at what's running — maybe a program has frozen, or is using more memory than it should. A task manager is a tool, graphical or text-based, that lists currently running processes along with their resource usage (processor time, memory), and typically lets you end a process that's misbehaving.
Diagram: Process and Task Manager Explorer
Run the Process and Task Manager Explorer MicroSim fullscreen
Process and Task Manager Explorer (MicroSim)
Type: microsim
sim-id: process-task-manager-explorer
Library: p5.js
Status: Specified
Learning objective: Students will analyze (Bloom L4: Analyze) how multiple processes share processor time under multitasking, and how a task manager reports and can end a running process.
Canvas: 700x420px, responsive — recompute the process-list table and the CPU-timeline strip widths as fractions of width inside windowResized().
Layout: a task-manager-style table listing five sample processes (e.g., "Web Browser," "Code Editor," "Terminal," "System Service," "Runaway Script") each with a simulated CPU % and memory (MB) column that updates slightly every couple of seconds. Above the table, a horizontal timeline strip shows short colored segments representing the operating system rapidly switching which process is actively using the processor, visualizing multitasking as fast alternation rather than true simultaneity.
Controls: a createButton() labeled "End Process" appears next to each row; clicking it removes that process from the table and from the timeline strip, simulating ending a misbehaving process. A "Restore All" button resets the table to its starting five processes.
Interaction: clicking anywhere on a table row (other than the End Process button) opens an infobox explaining process management in the context of that specific row, e.g., clicking "Runaway Script" (shown with an unusually high, still-climbing CPU % to make it visually stand out) explains why a task manager is useful for spotting exactly this kind of problem.
Implementation: p5.js. Store processes as an array of {name, cpuPercent, memoryMB} objects, updated on a timer via millis() with small randomized deltas to simulate realistic fluctuation. Render the table using text() at fixed row positions recalculated on resize. Render the timeline strip as short colored rectangles cycling through the active process list on a fixed interval to simulate scheduling.
Automating Routine Tasks
Typing the same sequence of commands every day gets old fast, and Linux gives you two complementary tools for skipping that repetition. An environment variable is a named value stored by the shell or operating system that programs can read to change their behavior — for example, $HOME holds the path to your home directory, and $PATH lists the directories the shell searches when you type a command name. A shell script is a text file containing a sequence of shell commands, saved so the whole sequence can be run at once instead of typed line by line — essentially, an algorithm (from Chapter 1) written in the shell's own language instead of Python.
The script below checks the time and appends a log entry to a file, useful for a robot that periodically records its status.
The first line, #!/bin/bash, tells the system this file should be run using the Bash shell specifically. The echo command prints text; here, that text includes $(date), which runs the date command and inserts its output directly into the message. The >> symbol appends that line to battery_log.txt instead of overwriting the file's previous contents. Once saved and made executable with chmod +x (from the previous chapter), this script can be run any time with ./battery_check.sh.
Running it by hand is still manual, though — a cron job solves that by scheduling a shell script (or any command) to run automatically at specified, recurring times, entirely on its own, without anyone remembering to type anything.
This cron entry has five time fields — minute, hour, day of month, month, and day of week — followed by the command to run. */15 in the minute field means "every 15 minutes," and a * in each of the remaining fields means "every value" for that field, so this job runs the battery check script every 15 minutes, every hour, every day.
Berry's Key Insight
A shell script is decomposition and algorithm design again, just written in a new language: you're still breaking a routine task into an ordered list of steps. A cron job is what makes that algorithm run itself, on schedule, without you standing there triggering it by hand.
Before the diagram below, notice that a shell script defines what to run, while a cron job defines when — they're two separate, complementary decisions.
Diagram: Cron Job Scheduler Timeline
Run the Cron Job Scheduler Timeline MicroSim fullscreen
Cron Job Scheduler Timeline (interactive timeline)
Type: timeline
sim-id: cron-job-scheduler-timeline
Library: vis-timeline
Status: Specified
Learning objective: Students will apply (Bloom L3: Apply) cron schedule syntax to predict the specific times a scheduled shell script will run over a sample day.
Canvas: 700x360px vis-timeline instance, responsive — vis-timeline resizes automatically to its container's width; call timeline.redraw() inside a window resize listener to ensure it stays correctly rendered.
Layout: a vis-timeline showing a single 24-hour day, with small event markers plotted at every time the current cron schedule would run the battery_check.sh script (starting with */15 * * * *, producing a marker every 15 minutes).
Controls: a createSelect() dropdown labeled "Cron Schedule" with three preset options — */15 * * * * (every 15 minutes), 0 * * * * (once every hour, on the hour), 0 9 * * * (once daily at 9 AM) — each re-populating the timeline's markers to match.
Interaction: clicking any marker on the timeline opens a vis-timeline-native popup (or a small infobox below the timeline) stating the exact time the script ran and restating, in plain language, what the currently selected cron schedule means. A short caption above the timeline always shows the currently selected raw cron syntax alongside its plain-language translation.
Implementation: vis-timeline Timeline class with a DataSet of point-in-time items recalculated whenever the schedule dropdown changes, using simple modular-arithmetic logic in JavaScript to generate the matching times for each of the three preset schedules over one 24-hour period.
Reaching Your Pi 500+ Remotely
Every command in this chapter so far assumed you were sitting in front of the Pi 500+ with its own keyboard and screen. That's not always true — a robot's Pi 500+ brain might be mounted somewhere inconvenient, or a whole classroom set might need managing from one teacher laptop. Two protocols make that possible. The SSH protocol (Secure Shell) provides an encrypted, text-based connection from one computer to another over a network, letting you type commands on a remote Pi 500+ exactly as if you were sitting in front of it. Using SSH to connect is called remote login. The VNC remote desktop protocol goes further, streaming the entire graphical desktop — not just a terminal — from the remote Pi 500+ to your screen, so you can see and click its desktop environment from anywhere on the network.
To connect to either one, you need to find the Pi 500+ on the network first. Local network discovery is the process of locating a device on the same local network without already knowing its numeric IP address, often by name instead. That name is the device's hostname: a human-readable label identifying a specific computer on a network (Raspberry Pi OS defaults to something like raspberrypi), which local network discovery can resolve to the correct IP address automatically — typing ssh pi@raspberrypi.local works without ever looking up an IP address by hand.
Both SSH and VNC start out disabled on a fresh Raspberry Pi OS install, for security reasons, and need to be turned on before they're used. The system configuration tool built into Raspberry Pi OS (raspi-config, available from the terminal or the desktop's Settings menu) is where you enable SSH, enable VNC, and set a custom hostname, among other system-wide settings.
For a classroom with several Pi 500+ boards on the same network, giving each one a distinct hostname through the system configuration tool — robot1, robot2, and so on — makes local network discovery far less confusing than leaving every board on the default raspberrypi hostname, where a teacher would otherwise have no reliable way to tell which board they've just connected to.
Now that both remote options have been explained, the table below compares when to reach for each one.
| SSH (Remote Login) | VNC (Remote Desktop) | |
|---|---|---|
| What you see | A terminal / shell prompt only | The full graphical desktop |
| Bandwidth needed | Low — just text | Higher — streaming a full screen image |
| Best for | Running commands, scripts, quick file edits | Anything requiring the mouse or a graphical program |
| Typical use in this book | Automating or checking on a headless robot's Pi | Full remote control of a classroom Pi 500+ |
Diagram: SSH vs VNC Remote Access Explorer
Run the SSH vs VNC Remote Access Explorer MicroSim fullscreen
SSH vs VNC Remote Access Explorer (interactive infographic)
Type: interactive-infographic
sim-id: ssh-vnc-remote-access-explorer
Library: p5.js
Status: Specified
Learning objective: Students will compare (Bloom L4: Analyze) SSH remote login and VNC remote desktop access in terms of what data they transmit and when each is the better choice.
Canvas: 700x420px, responsive — recompute the two-panel layout as fractions of width inside windowResized(), stacking panels vertically below 520px wide.
Layout: two side-by-side panels, "SSH" (left) and "VNC" (right), each showing a simplified laptop icon on one side and a Pi 500+ icon on the other, connected by an animated data stream: a thin line of small text characters for SSH (representing a terminal-only connection), and a wider stream of small rectangular "frame" icons for VNC (representing a streamed graphical desktop), visually reinforcing the bandwidth difference described in the chapter's comparison table.
Controls: a createButton() labeled "Connect via SSH" and a separate createButton() labeled "Connect via VNC," each triggering that panel's animated data stream; a createButton() labeled "Reset."
Interaction: clicking either laptop or Pi icon opens an infobox reminding the student what local network discovery and hostname mean in this context (e.g., "the laptop found this Pi 500+ using its hostname, raspberrypi.local, instead of a typed-in IP address"). After each animated connection completes, a short caption appears summarizing that protocol's typical use, matching the chapter's comparison table.
Implementation: p5.js. Represent each data stream as a looped particle system — small text glyphs for SSH, small rectangles for VNC — moving along a fixed path between the two icons, using frameCount modulo a period to control looping. Icon click hit-testing via dist() against each icon's center and a fixed radius.
You've Got This!
 SSH and VNC both fail loudly the first time you try them — a wrong hostname, a firewall blocking the connection, SSH not yet enabled in the system configuration tool. That's not a sign you did something wrong conceptually; it's a checklist problem. Work through it the way Chapter 1 taught you: one suspect at a time.
Bringing It Together
You can now manage files, install and update software, automate a repeating task, and reach a Pi 500+ from anywhere on the network — the everyday skills that keep a Linux computer useful long after the first time you set it up. The next chapter puts all of it to work on the Pi 500+'s signature feature: programming its per-key RGB keyboard lighting, where the Python skills, file management habits, and even the event-driven programming ideas from Chapter 1 all come together in one genuinely fun project.
You Unlocked a Superpower!
 That's berry impressive — you just went from "can boot a Pi" to "can administer one," including reaching it from clear across the room. STEM is our superpower! Let's build something — see you in Chapter 13!