Lab 1: Meet Your Kit
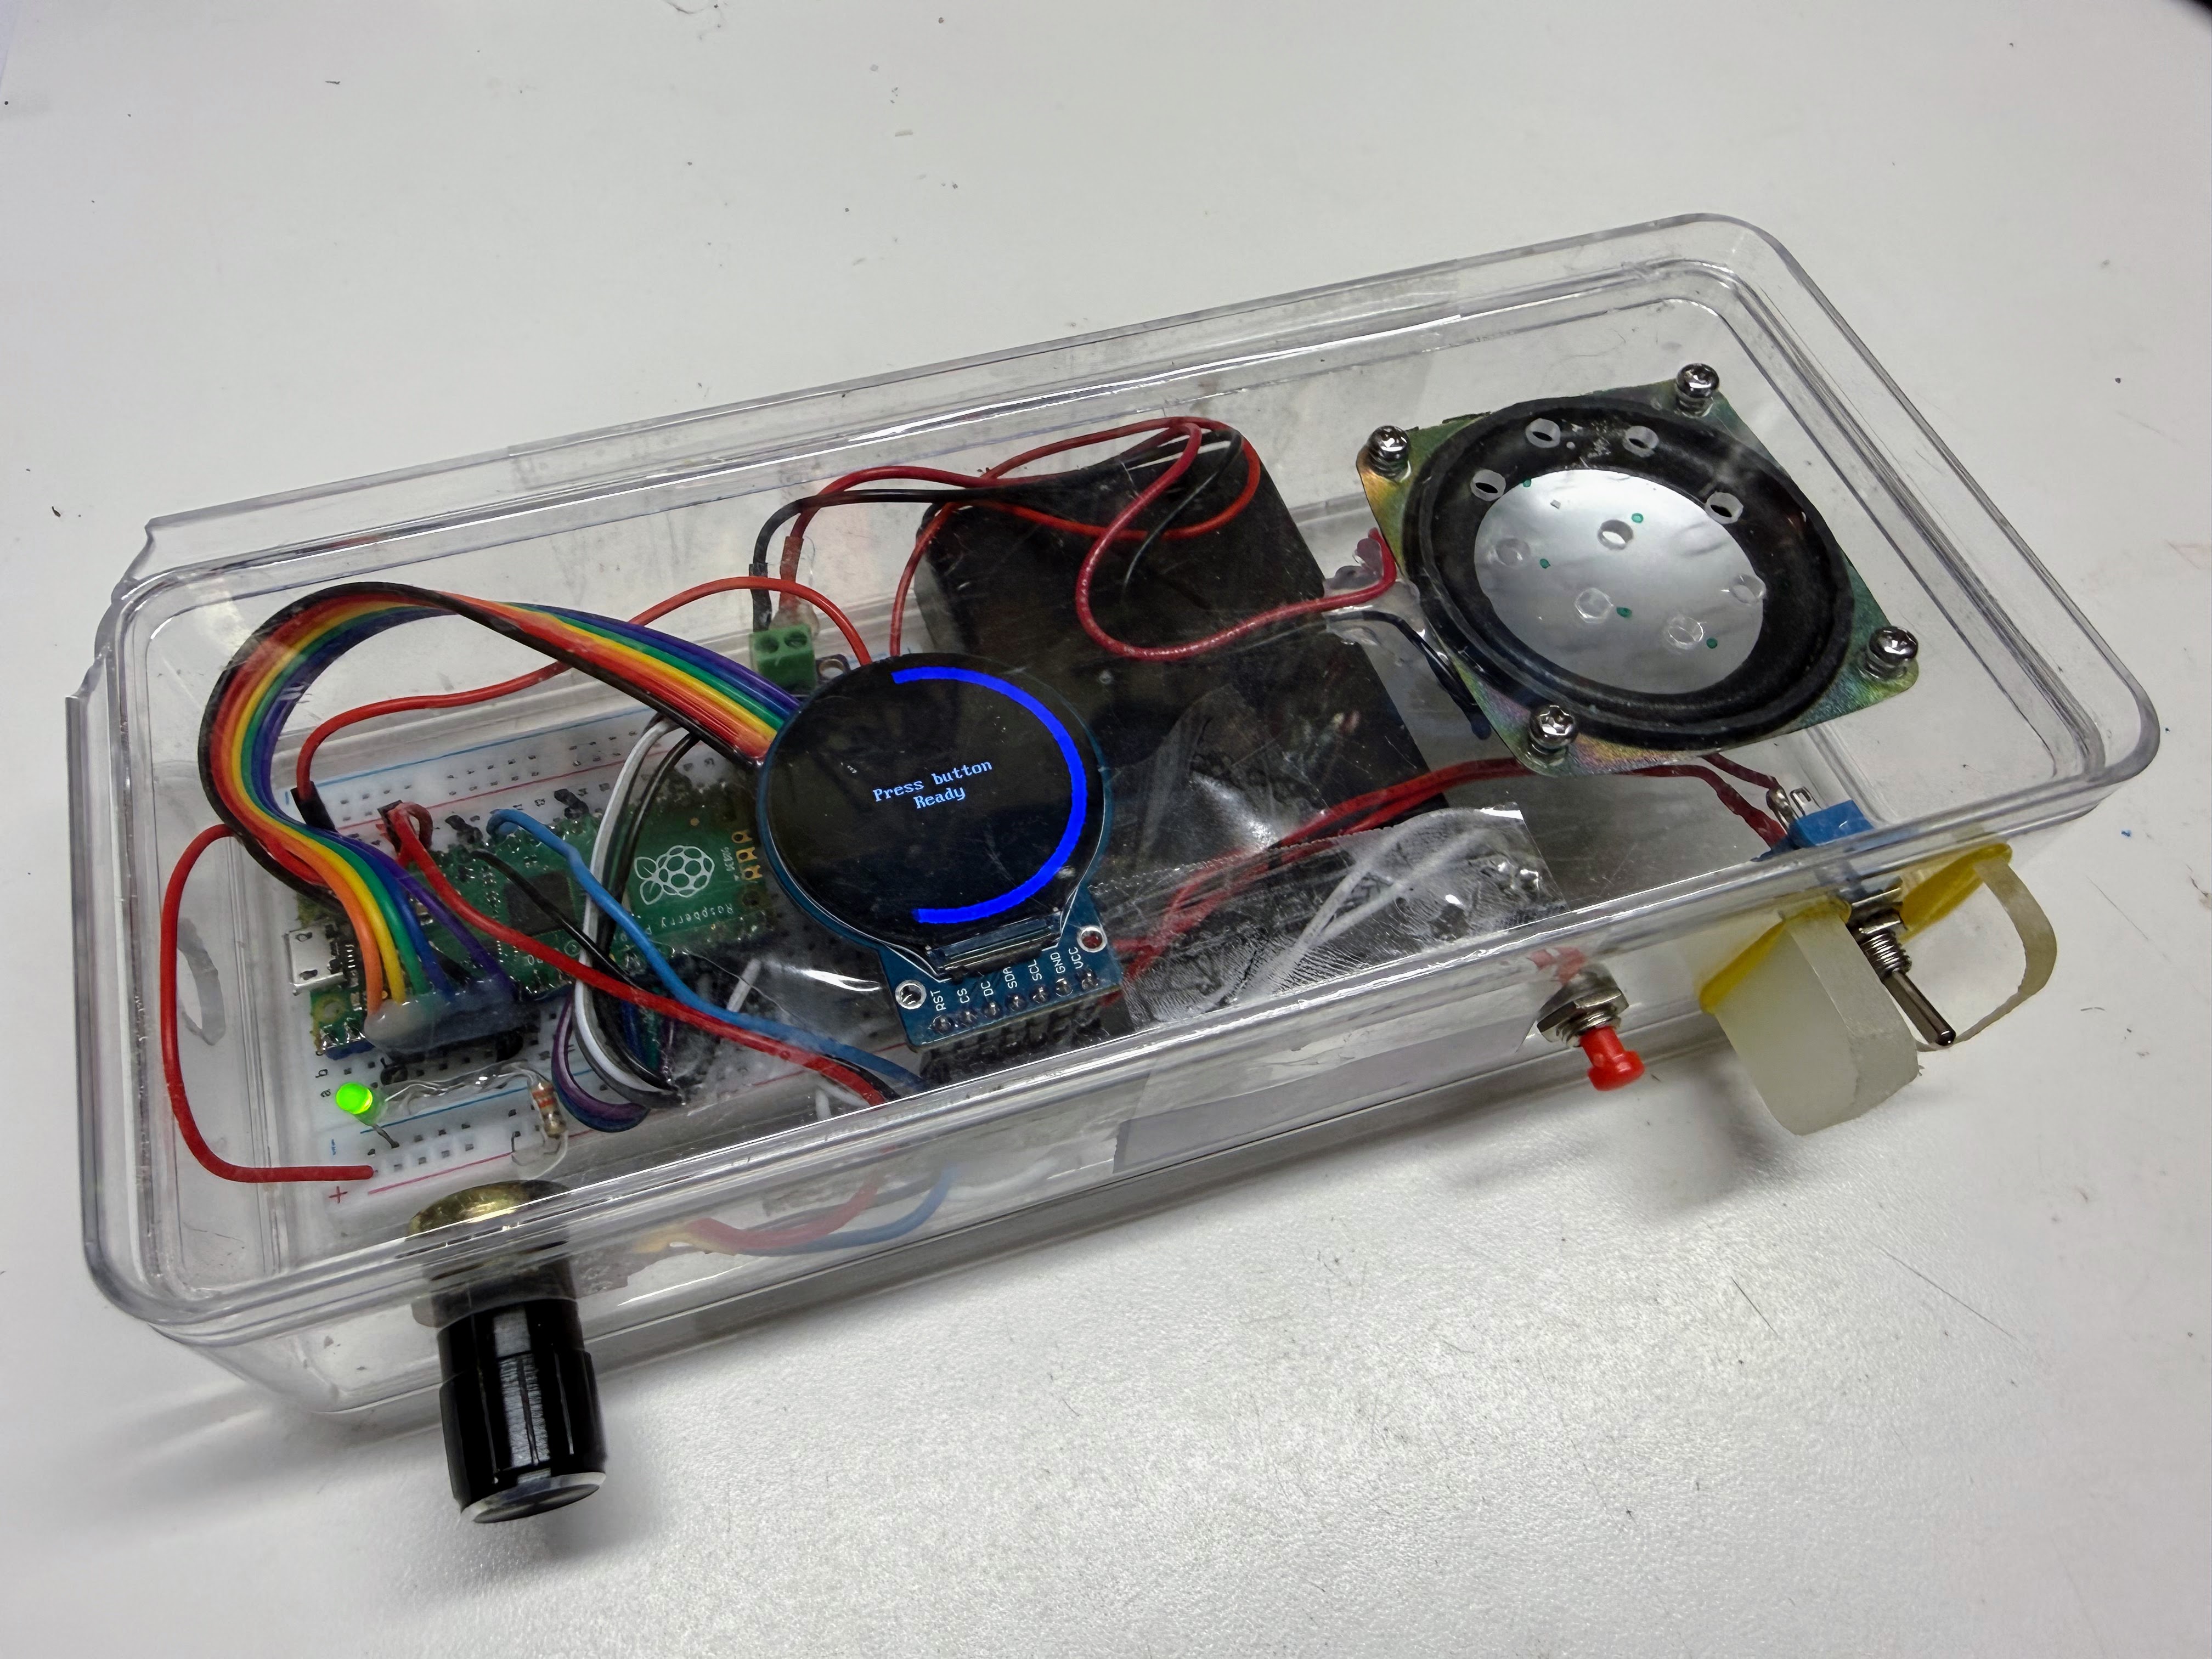
You are holding a small computer inside a clear plastic box. It has a speaker, a round color screen, a button, and a knob. In this lab, you will turn it on and try every part — no computer and no typing needed yet.
Welcome, maker!
 No computer, no typing, no code yet — just flip a switch and press
some buttons. Let's meet the kit with our hands before we ever open
Thonny!
No computer, no typing, no code yet — just flip a switch and press
some buttons. Let's meet the kit with our hands before we ever open
Thonny!
What You Need
- Your MAX98357A kit (the clear box)
- 3 fresh AA batteries (already inside, if this is a new kit)
What's Inside the Box
You do not need to open the box. Here is what each part does:
- The speaker on top makes sound.
- The round screen on top shows pictures and words.
- The button on the side plays a sound when you press it.
- The knob on the side turns like a volume dial on an old radio.
- The power switch on the side turns the whole kit on and off.
- The small LED light turns on when the kit has power.
Inside the box, hidden from view, is a tiny computer called a Raspberry Pi Pico. It runs a program every time you turn the kit on. That program is what makes the button, knob, screen, and speaker all work together.
Step-by-Step
Step 1: Turn It On
Find the power switch on the side of the box. Flip it to the on position.
Look for the small LED light. It should turn on. If it does not turn on, tell an adult — the batteries may need to be replaced.
Step 2: Watch the Screen
The round screen should light up. It will show the word "Ready" somewhere near the middle. This means the kit is waiting for you to do something.
Step 3: Press the Button
Find the button on the side of the box. Press it once and let go.
You should hear a sound come out of the speaker — a beep, a laugh, or some other robot noise. At the same time, the screen should show the name of the sound you just heard.
Press the button again. A different sound should play. Keep pressing it a few more times. Notice that you never hear the exact same sound twice in a row — the kit plays through its whole list of sounds in order before it starts over.
Step 4: Turn the Knob
Find the knob on the side of the box. While a sound is playing (or right after you press the button), slowly turn the knob.
Watch the screen. A blue ring should grow or shrink around the edge of the circle as you turn the knob. Listen closely — the sound should get louder or quieter as the ring grows or shrinks.
Turn the knob all the way in one direction until the ring almost disappears, then press the button again. The sound should be very quiet. Turn the knob all the way the other way and press the button one more time — now it should be loud.
Watch and listen at the same time
 Try turning the knob while a sound is still playing instead of before
you press the button. Watching the ring change while you hear the
volume shift is the fastest way to connect what you see to what you
hear.
Try turning the knob while a sound is still playing instead of before
you press the button. Watching the ring change while you hear the
volume shift is the fastest way to connect what you see to what you
hear.
Step 5: Turn It Off
When you are done exploring, flip the power switch back to off. The screen and LED should turn off.
Try It Yourself
- Can you make the sound as quiet as possible without turning it all the way to silent?
- Count how many different sounds the kit can play before it repeats one. Write the number down — you will check your answer in a later lab.
- Read the name on the screen out loud each time you press the button. Which sound is your favorite?
What's Happening Under the Hood
Everything you just did — playing sounds, changing the volume, showing words on the screen — is controlled by a program written in a language called MicroPython. A program is just a list of instructions a computer follows, one step at a time, over and over.
In the next lab, you will connect this kit to a computer and look at the actual instructions that make it work.
Check Your Understanding
- What part of the kit do you press to play a sound?
- What part of the kit do you turn to change the volume?
- What word appears on the screen when the kit is waiting for you to press the button?
- True or false: pressing the button always plays the exact same sound.
You just explored a whole robot kit!
 Power switch, button, knob, screen, speaker — you tried every part
with your own hands, no code required. That's exactly how real
engineers get to know new hardware!
Power switch, button, knob, screen, speaker — you tried every part
with your own hands, no code required. That's exactly how real
engineers get to know new hardware!