ESP32 TTGO Lab
The ESP32 is a low-cost (under $10) microcontroller. A microcontroller is a tiny computer on a single chip. This one has built-in WiFi and Bluetooth. WiFi lets it connect to the internet. Bluetooth lets it talk to phones and other devices. In this lab, you will use a special version of the ESP32 called the TTGO. The TTGO has a small color screen built right in.
Welcome to This Lab
 In this lab, you will set up the ESP32 microcontroller with MicroPython. Let's build something amazing!
Step 1: Install the USB to UART Bridge Driver
Your computer talks to the ESP32 through a USB cable. But your computer needs a special piece of software called a driver to understand the ESP32's language. This driver is called the USB to UART Bridge Virtual COM Port (VCP) Driver. UART stands for Universal Asynchronous Receiver-Transmitter — it is the way the ESP32 sends and receives data over the cable.
Follow these steps to install the driver:
- Go to the Silicon Labs driver page: https://www.silabs.com/developers/usb-to-uart-bridge-vcp-drivers
- Download the correct driver for your operating system (Mac or Windows).
- Run the installer and follow the on-screen instructions.
- Plug in your ESP32 with a USB cable.
- Open a Terminal window and type this command, then press Enter:
1 | |
- Look for a line that says:
1 | |
If you see that line, the driver is working. If you do not see it, try restarting your computer and checking again.
Monty's Tip
 If you still do not see
 /dev/cu.SLAB_USBtoUART after rebooting, try a different USB cable. Some cables only carry power and cannot send data.
For more help on Mac, see the Espressif guide: https://docs.espressif.com/projects/esp-idf/en/latest/esp32/get-started/establish-serial-connection.html
Step 2: Create a Python Environment for the ESP32
You will use a tool called Conda to create a safe workspace. A Conda environment is like a separate box for your Python tools. It keeps the ESP32 tools separate from other Python projects on your computer.
Run these two commands in your Terminal, one at a time:
1 | |
1 | |
What each line does:
conda create -n esp32 python=3— Creates a new Conda environment namedesp32using Python 3.conda activate esp32— Turns on (activates) that environment so the next commands run inside it.
Step 3: Install the esptool
The esptool is a program that lets you send new software to your ESP32. You will use it to erase old software and load fresh MicroPython firmware. Firmware is the software that lives inside the chip and controls how it works — think of it like the chip's built-in brain.
Run this command in your Terminal:
1 | |
You will see output that looks like this:
1 2 3 4 5 6 | |
When you see Successfully installed, the esptool is ready to use.
Key Idea
 Firmware is the software built into a chip. You are about to replace the old firmware with MicroPython so you can program the ESP32 in Python.
Step 4: Erase the Old Firmware
Before you can load MicroPython, you must erase whatever software is already on the ESP32. This is like wiping a whiteboard clean before writing something new.
Run this command:
1 | |
What each part does:
esptool.py— Runs the esptool program.--port /dev/cu.SLAB_USBtoUART— Tells esptool which USB port the ESP32 is connected to.erase_flash— Erases all the stored software on the chip.
Watch Out!
 Never unplug the ESP32 while it is erasing or flashing. Unplugging too early can break the firmware and you may need to start over.
Step 5: Download the New Firmware
Now you need to download the MicroPython firmware for your ESP32. Go to this page and download the ESP32_All prebuilt binary file:
https://github.com/loboris/MicroPython_ESP32_psRAM_LoBo/wiki/firmwares
Save the downloaded file somewhere easy to find, like your Desktop or Downloads folder.
Step 6: Load the New Firmware onto the ESP32
Now you will copy the new firmware onto the ESP32. This is called flashing the chip.
Follow these steps:
- Open your Terminal.
- Move into the folder where you downloaded the firmware:
1 | |
- Run the flash script:
1 | |
What each part does:
cd esp32_all/— Moves the Terminal into the firmware folder.../flash.sh— Runs the flash script that is one folder above.-p /dev/cu.SLAB_USBtoUART— Tells the script which USB port to use.
You will see output like this while it works:
1 2 3 4 5 6 7 8 9 10 11 12 13 14 | |
Wait until the process finishes completely before doing anything else.
Configure Thonny
Thonny is the program you will use to write and run MicroPython code on your ESP32. You need to tell Thonny two things: which USB port the ESP32 uses, and which kind of microcontroller it is.
Set the Serial Port
First, tell Thonny which port to use to find your ESP32.
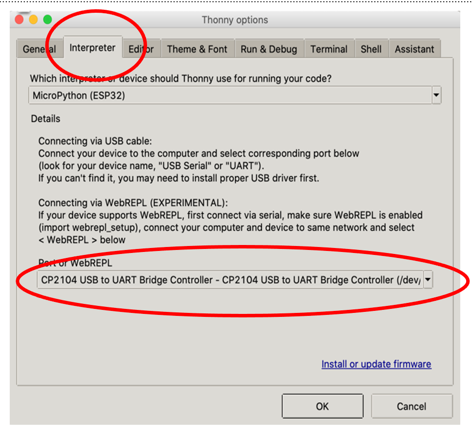
Set the Interpreter
Next, tell Thonny to use the ESP32 version of MicroPython. An interpreter is the software that reads and runs your Python code.
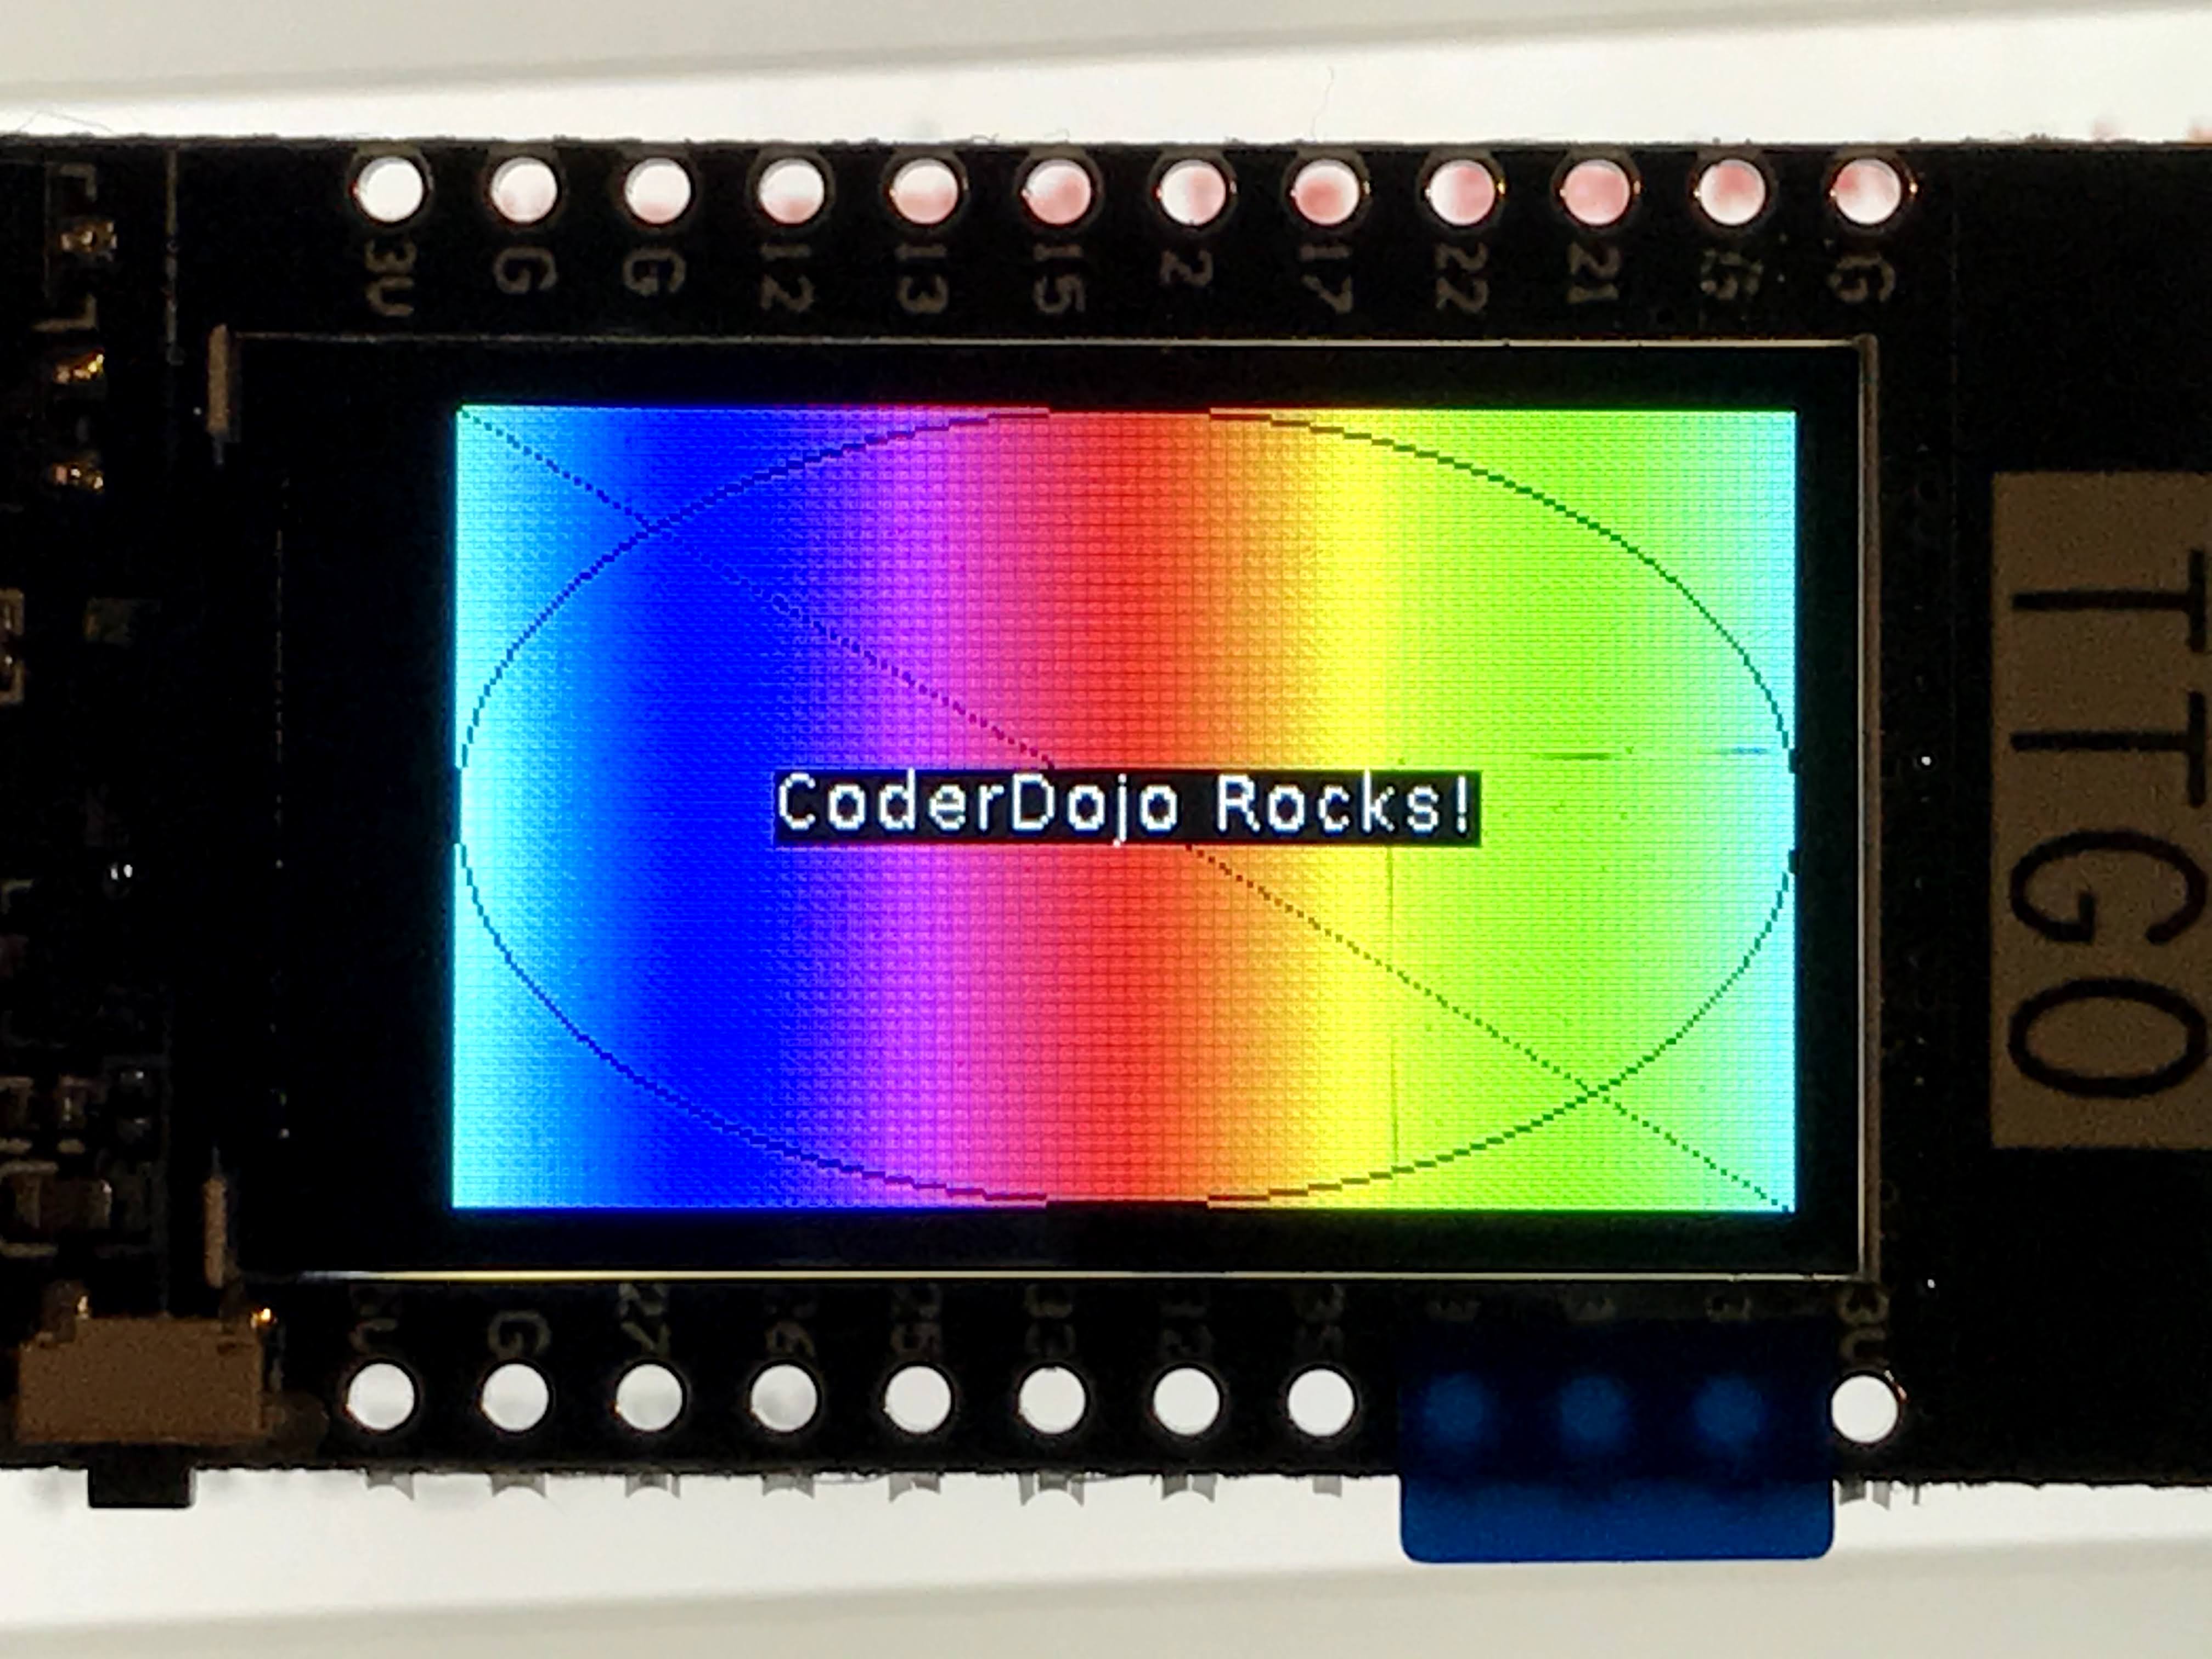
Run a Test Program
Now let's check that everything works. This program draws a colorful background on the screen and shows some text.
Type this code into Thonny and press the Run button:
1 2 3 4 5 6 7 8 9 10 11 12 13 14 15 16 17 18 19 20 21 22 23 24 25 26 27 28 29 30 31 32 33 34 35 36 37 | |
What each section does:
- Import lines — Load the tools needed to control the screen and time.
display.TFT()— Creates a display object. You use this object to give drawing commands to the screen.tft.init(...)— Sets up the screen. Each argument tells it which pin does which job.tft.setwin(...)— Defines the drawing area on the screen.- The
forloop — Draws 241 colored lines side by side to make a rainbow. tft.set_fg(0x000000)— Changes the drawing color to black (for the circle and line).tft.ellipse(...)— Draws a circle.tft.line(0, 0, 240, 135)— Draws a diagonal line from the top-left to the bottom-right corner.- Text lines — Calculate the center of the screen and draw "CoderDojo Rocks!" in white.
You should see this on the ESP32 display:
You Can Do This!
 Setting up firmware can feel like a lot of steps. That is completely normal — even experienced coders have to go through this process. You've got this, coder!
References
Great Work!
 You have set up your ESP32 with MicroPython and run your first program on it! Next, you will write more programs and start exploring what this tiny computer can do.