Introduction to Sound and Music in MicroPython
Welcome to Sound and Music
 In this section, you will make your Pico play sounds, tones, and music. Get ready to build something that you can actually hear!
How Microcontrollers Make Sound
Microcontrollers are great at switching a pin on and off very fast. These pins produce a digital signal — a voltage that is either zero volts (off) or 3.3 volts (on). There is no in-between.
But sound needs a signal that changes smoothly, like a wave. So how can a digital chip make sound?
The answer is a trick called Pulse-Width Modulation (PWM). PWM works by switching a pin on and off so fast that the speaker cannot follow each individual switch. The speaker hears the average voltage instead.
When PWM switches faster, the pitch goes up. When it switches slower, the pitch goes down.
Key Idea
 PWM creates sound by switching a pin on and off very fast. The faster it switches, the higher the pitch you hear.
What Is a Duty Cycle?
The duty cycle is how much of the time the signal is "on" compared to "off." A 50% duty cycle means the signal is on half the time and off the other half.
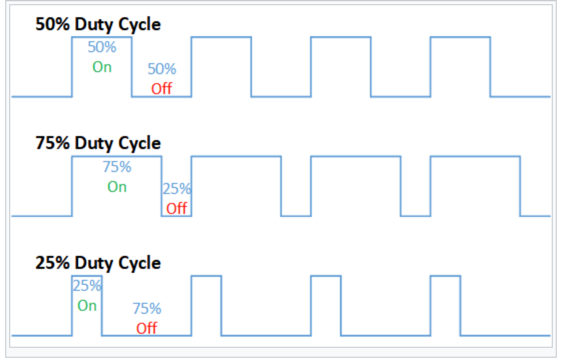
For making sound, we use a 50% duty cycle. This gives a nice, even tone. On the Raspberry Pi Pico, you set the duty cycle like this:
1 | |
When your program is done playing a tone, you must turn the duty cycle back to zero:
1 | |
If you forget that last line, the tone keeps playing even after your program stops. This happens because the PWM hardware runs on its own — it does not need the main program to keep going!
Importing the Libraries You Need
Every sound program starts with two imports:
1 2 | |
Pinlets you control a GPIO pin.PWMlets you create a Pulse-Width Modulation signal on that pin.sleeppauses the program for a set number of seconds.
Monty's Tip
 The
The sleep function takes a number of seconds. Use sleep(0.5) to wait half a second, or sleep(0.1) to wait one tenth of a second.
Ways to Connect a Sound Device
You can connect several different devices to make sound with your Pico:
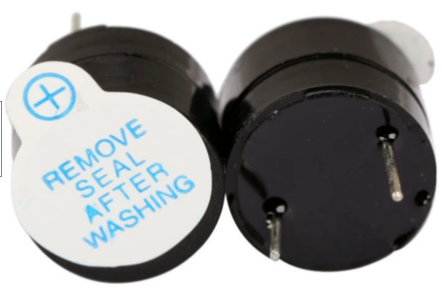
- Active buzzer — the easiest option. Apply power and it beeps at one fixed pitch.
- Passive buzzer — a tiny speaker-like device. You send it a PWM signal and it plays whatever pitch you choose. Most labs use this type.
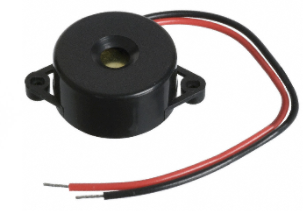
- Small magnetic speaker — louder than a buzzer, but needs more current than a GPIO pin can supply. Always use an amplifier module between the Pico and a speaker.
- Speaker with amplifier — an amplifier board (about $1.20) boosts the Pico's signal to drive a real speaker at a useful volume.
Watch Out!
 Never connect a speaker directly to a GPIO pin without an amplifier. The pin cannot supply enough current and you may damage the Pico.
What You Will Learn in This Section
Each lab in this section builds on the last one:
- Play a Tone — make the Pico play one single beep.
- Play Three Tones — play a sequence of three different pitches.
- Play a Scale — step through many pitches automatically.
- Play Mario — play a famous video-game melody.
- Eight-Key Piano — turn eight buttons into a playable keyboard.
- Playing an Audio File — play a real WAV sound file stored on the Pico.
- I2S Standard — learn about the Inter-IC Sound (I2S) digital audio bus.
- Converting MP3 to WAV — convert audio files on your computer.
- MIDI — send Musical Instrument Digital Interface (MIDI) messages to other devices.
References
- Buzzer vs Speaker
- Juke Phone in C — convert an old telephone into an MP3 jukebox. Written in C, but could be adapted to MicroPython.
- Mannbro Pico ChipSound Music Player
Great Work!
 You now know the basics of how the Pico makes sound. Pick the first lab and start playing!