Basic Drawing Functions
Welcome to OLED Drawing
 In this lab, you will draw shapes and text on a tiny OLED (Organic Light-Emitting Diode) display. Let's build something amazing!
An OLED display is a small screen that lights up tiny dots called pixels. Our display has 128 pixels across and 64 pixels tall. That gives us 8,192 pixels to work with!
How the Screen is Organized
Think of the display like a piece of graph paper. Every square on the paper is one pixel. The top-left corner is position (0, 0). Moving right increases the X number. Moving down increases the Y number.
So the bottom-right corner is at position (127, 63).
The Four Basic Steps
To draw anything on the screen, you follow four steps every time:
- Set up the display object so MicroPython knows how to talk to it.
- Clear the screen by filling it with black pixels using
oled.fill(0). - Draw your text or shapes into memory using drawing functions.
- Send your drawing to the display with
oled.show().
Step 4 is very important. Nothing appears on the screen until you call oled.show().
Monty's Tip
 Always call
 oled.show() after drawing. Without it, nothing appears on the screen — even if your code looks correct!
Setting Up the Display
Our display uses a chip called the SSD1306. The SSD1306 talks to the Pico over a two-wire connection called I2C (Inter-Integrated Circuit). I2C uses one wire for a clock signal and one wire for data.
Here is the code to set up the display:
1 2 | |
What each line does:
from ssd1306 import SSD1306_I2C— loads the display driver file so you can use it.oled = SSD1306_I2C(128, 64, i2c)— creates your display object and tells it the screen size is 128 wide and 64 tall.
Drawing Functions Table
Here are the most useful drawing functions for the SSD1306 display.
Remember: color 1 means white (pixel on). Color 0 means black (pixel off).
| Function | What it does | Example |
|---|---|---|
oled.fill(color) |
Fill the whole screen with one color | oled.fill(0) clears to black |
oled.text("Hello", x, y) |
Draw text starting at position (x, y) | oled.text("Hi!", 0, 0) |
oled.pixel(x, y, color) |
Light up one single pixel | oled.pixel(10, 10, 1) |
oled.hline(x, y, length, color) |
Draw a horizontal line | oled.hline(0, 0, 128, 1) |
oled.vline(x, y, length, color) |
Draw a vertical line | oled.vline(0, 0, 64, 1) |
oled.line(x1, y1, x2, y2, color) |
Draw a line at any angle | oled.line(0, 0, 127, 63, 1) |
oled.rect(x, y, width, height, color) |
Draw an empty rectangle outline | oled.rect(10, 10, 50, 30, 1) |
oled.fill_rect(x, y, width, height, color) |
Draw a filled rectangle | oled.fill_rect(10, 10, 50, 30, 1) |
oled.show() |
Send your drawing to the screen | oled.show() |
oled.invert(state) |
Flip black and white on the whole screen | oled.invert(1) |
oled.scroll(x, y) |
Slide the image across the screen | oled.scroll(20, 0) |
Your First Program: Hello World
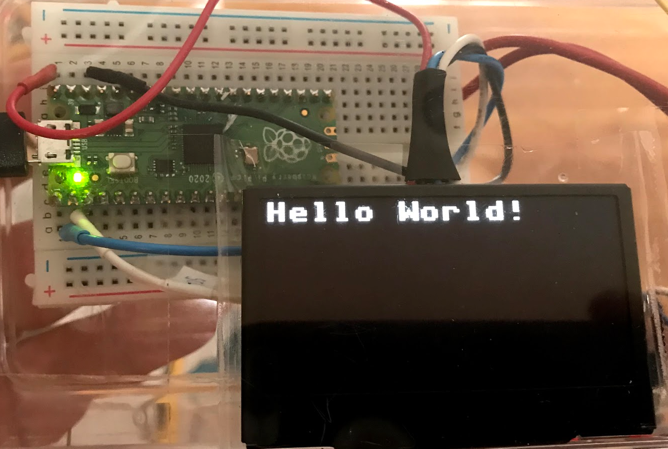
Here is a complete program that displays "Hello World!" on the screen.
1 2 3 4 5 6 7 8 9 10 11 12 13 14 | |
What each line does:
from machine import Pin, I2C— loads the tools for controlling pins and I2C.from ssd1306 import SSD1306_I2C— loads the display driver.sda = Pin(0)— sets GP0 as the data wire.scl = Pin(1)— sets GP1 as the clock wire.i2c = I2C(0, sda=sda, scl=scl)— creates the I2C connection using those two pins.oled = SSD1306_I2C(128, 64, i2c)— creates the display object.oled.fill(0)— fills the screen with black (clears any old image).oled.text("Hello World!", 0, 0)— draws the text starting at position x=0, y=0.oled.show()— sends everything to the screen so you can see it.
This displays:
Key Idea
 The display has a framebuffer — a region of memory that holds your drawing before it appears on screen. Think of it like a canvas you paint on. The
 oled.show() command hangs the canvas on the wall so everyone can see it.
Seeing All Available Drawing Functions
You can ask MicroPython to list every function a display object has. Use the dir() function to see the full list.
1 2 | |
This prints:
1 2 3 4 5 | |
The names that start and end with __ (double underscores) are used by Python internally. The rest — like fill, text, and show — are the drawing functions you can use.
Drawing Pixels One at a Time
You can draw a simple picture by turning individual pixels on or off. Here is an example that draws a small heart shape using a grid of 1s (white pixels) and 0s (black pixels).
1 2 3 4 5 6 7 8 9 10 11 12 13 14 15 16 17 | |
What each line does:
ICON = [...]— defines the heart as a grid of numbers (1 = white, 0 = black).oled.fill(0)— clears the screen before drawing.for y, row in enumerate(ICON)— goes through each row of the grid, one at a time.yis the row number.for x, pixel_color in enumerate(row)— goes through each item in the row.xis the column number.oled.pixel(x, y, pixel_color)— turns that one pixel on or off.oled.show()— sends the finished drawing to the screen.
Power and Display Control Functions
These functions let you control the display beyond just drawing.
1 2 3 4 5 6 7 | |
Watch Out!
 OLED screens can get burn-in if the same image stays on screen for a long time. Always turn off or change the display when you are not watching it.
The Framebuffer and Blit
A framebuffer is a region of memory (RAM) that holds an exact copy of what is on the screen. When you call oled.fill() or oled.text(), you are writing into the framebuffer — not directly to the screen. Only oled.show() copies the framebuffer to the real display.
The blit() function (short for block image transfer) copies a rectangular image from one framebuffer into another. This lets you draw a small image and paste it anywhere on the screen.
1 2 3 4 5 6 7 8 9 | |
What each line does:
import framebuf— loads the framebuffer tool.small_buf = bytearray(8 * 8 * 1)— creates memory to hold an 8-by-8 pixel image.framebuf.FrameBuffer(...)— wraps that memory into a drawable surface.small_fb.line(0, 0, 7, 7, 1)— draws a diagonal line inside the small image.oled.blit(small_fb, 10, 10, 0)— copies the small image onto the main screen at position (10, 10).oled.show()— updates the screen.
References
- MicroPython Documentation on FrameBuffer
- Drawing Primitive Shapes
- Driving I2C OLED displays with MicroPython - by Martin Fitzpatrick
- ST7735 Micropython Driver by Anthony Norman
Great Work!
 You can now draw text, shapes, and even pixel art on your OLED display! Next, you will learn how to use bitmaps to draw more detailed images.