Introduction to MicroPython Robots
Welcome to the Robots Section
 Robots are the most exciting projects in this course. You will write programs that make a real robot move, avoid obstacles, and show its mood. Let's get started!
Robots are one of the best ways to learn programming. When you write code and the robot moves, you can see your program working in the real world. You will learn how to control motion, read sensors, and make decisions in your code.
The Raspberry Pi Pico and the Maker Pi RP2040 board make this possible for everyone. The Raspberry Pi Pico is a tiny microcontroller (a small computer chip) that costs just $4. It runs MicroPython, which means you write programs in the same Python language you may already know.
Robot Journey Map
This section of the course takes you through five robot projects. Each project builds on the last. You start with a simple rolling robot and end with a robot you can tune with knobs and buttons.
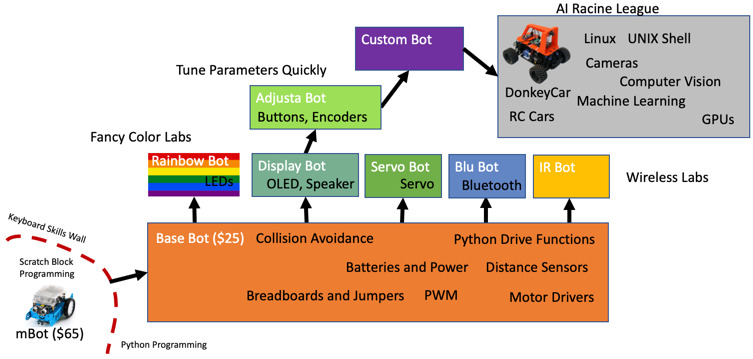
The price of a base robot is about $25 if you order low-cost parts online. Buying parts in larger quantities for a classroom lowers the cost even more. You can also buy an older Arduino robot kit and swap the processor for a Raspberry Pi Pico.
Note
This section covers Raspberry Pi Pico robots with external motor drivers. We also have many robot lessons that use the Cytron Maker Pi RP2040 board. Those robots cost about $20 and are easier for younger students because they do not need any breadboards.
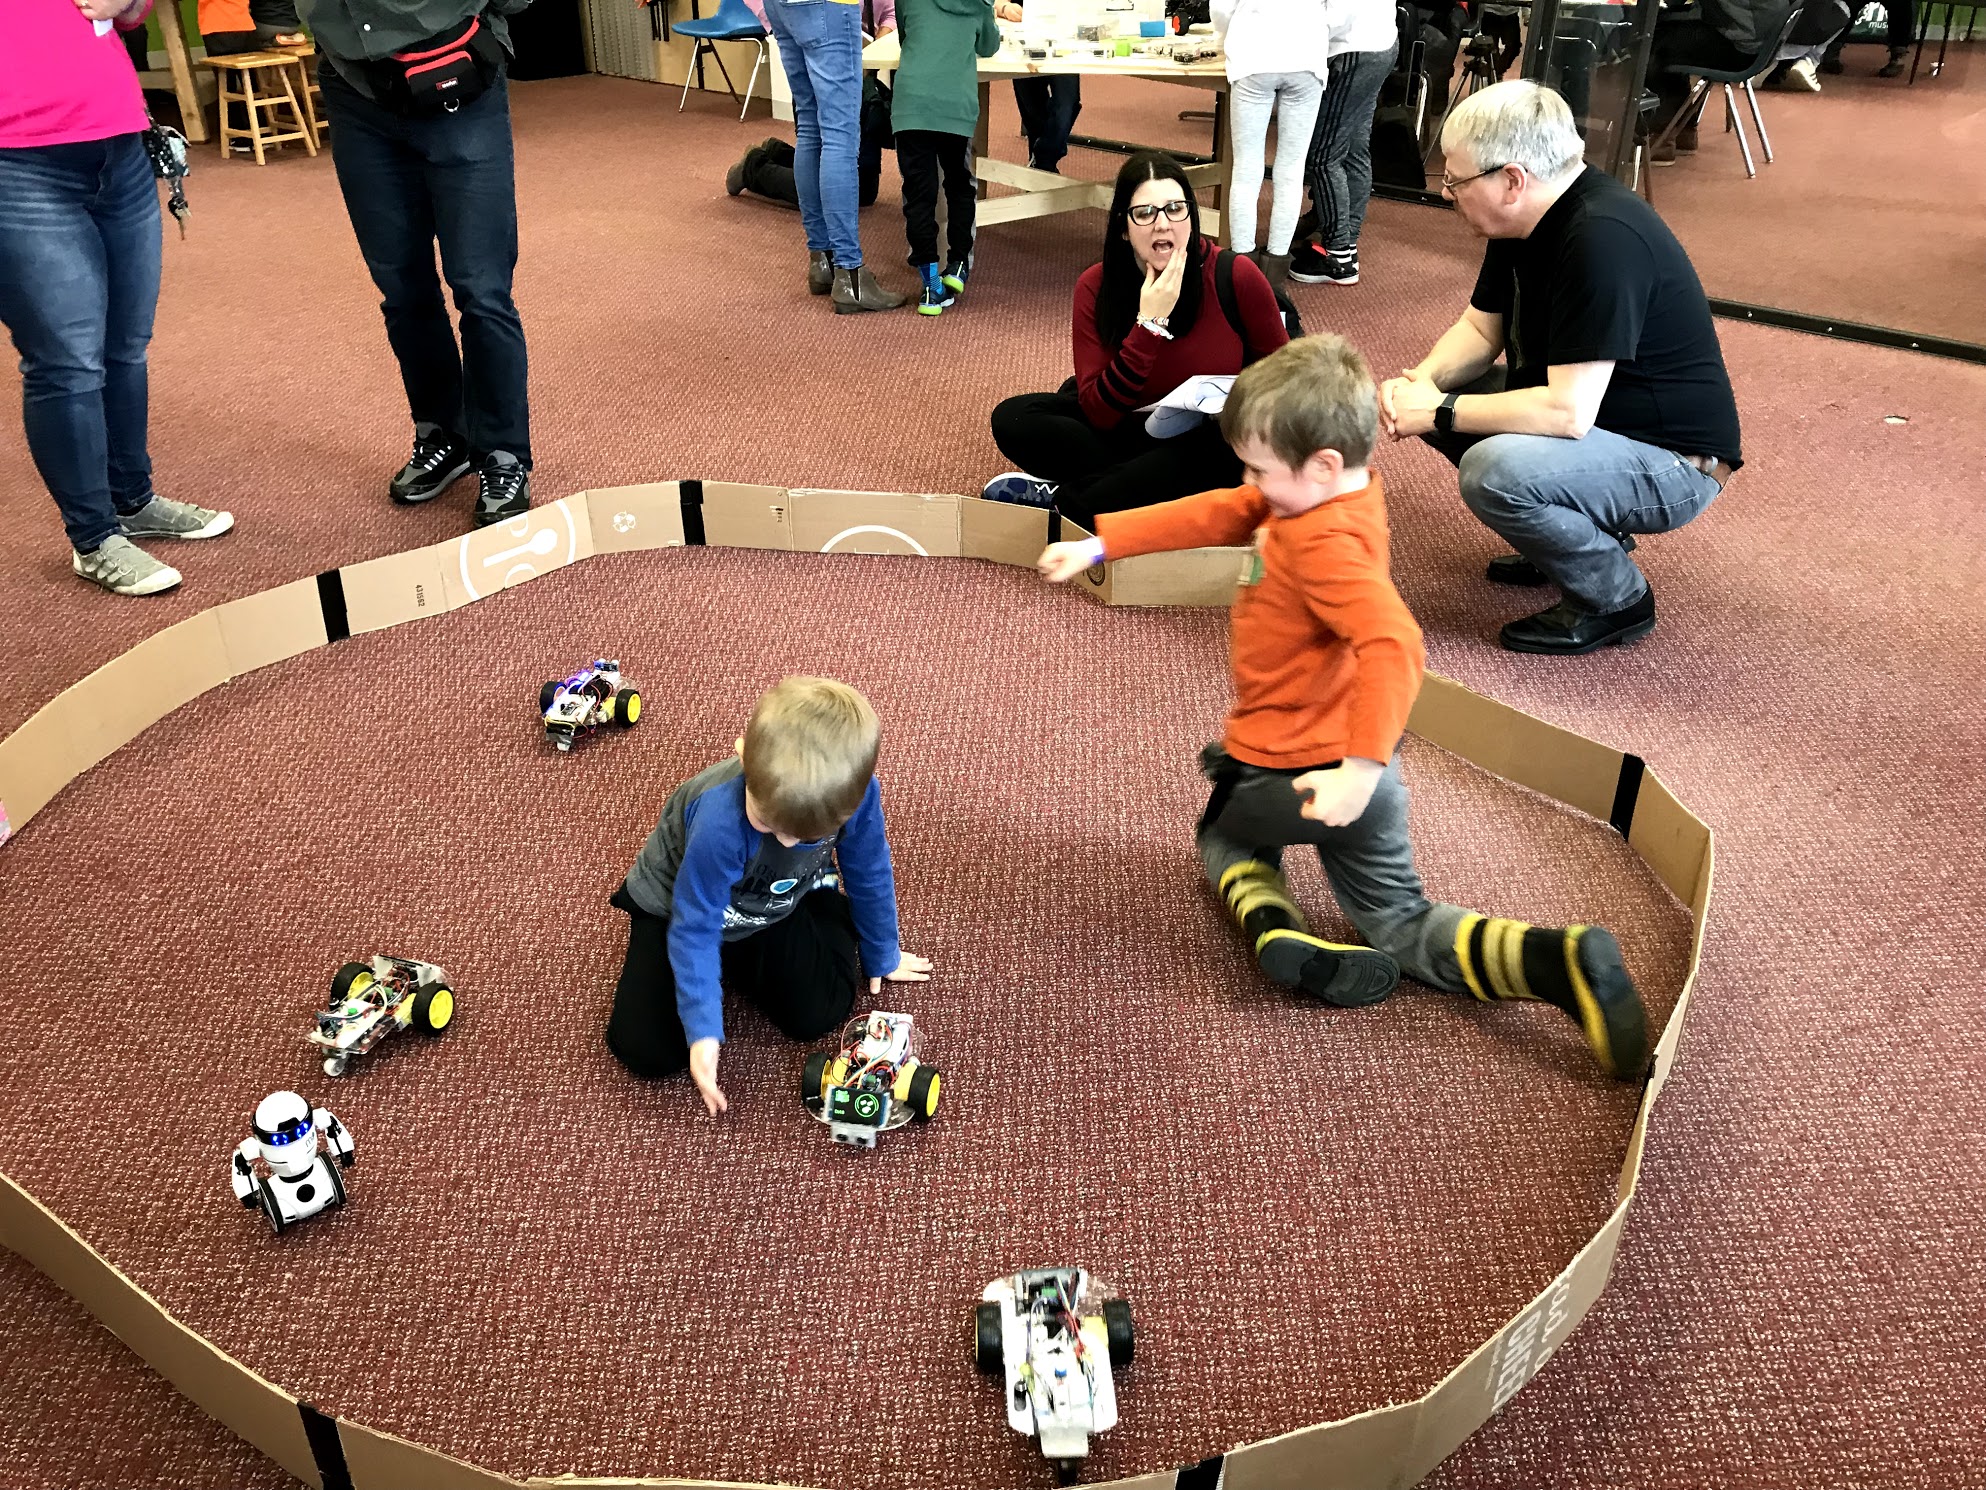
The base robot is a collision avoidance robot. A collision avoidance robot drives forward until it gets close to an object. Then it backs up and turns in a new direction. You test the robot inside a "Robot Corral" — a flat area with six-inch-high walls. You can change settings in your code to help the robot navigate without hitting the walls.
Key Idea
 A microcontroller is a tiny computer that lives inside a chip. It reads sensors and controls motors based on the program you write. The Raspberry Pi Pico is a microcontroller that runs MicroPython.
Robot Projects in This Section
Here are the five robot projects you will build:
-
Base Bot — This is the foundation robot. It uses a SmartCar chassis (the rolling frame), two DC motors (motors that spin when electricity flows through them), a battery pack, and wheels. On top of the chassis you add a breadboard, jumper wires, a motor controller, a distance sensor, and the Raspberry Pi Pico.
-
Rainbow Bot — You take the base robot and add a strip of color LEDs (light-emitting diodes). The LEDs change color based on what the robot is doing. For example, when the robot turns right, the LEDs glow red.
-
IR Sensor Bot — You replace the distance sensor with three infrared (IR) sensors. IR sensors detect objects using invisible light. This gives the robot three separate "eyes" to watch for obstacles.
-
Face Bot — You add a small OLED display to the front of the robot. An OLED (Organic Light-Emitting Diode) display is a tiny screen. The robot shows different cartoon faces to match what it is doing — a happy face when driving, a surprised face when it spots something.
-
Adjustable Parameter Bot — You extend the Face Bot by adding buttons and a rotary encoder (a knob you can turn). These let you change settings like speed and turning distance without rewriting your code.
Parts
The base robot uses these main parts:
Chassis
The SmartCar Chassis is a plastic frame with two wheels and a caster. A caster is a small ball that rolls in any direction and supports the back of the robot.
Sensors
- Ping Ultrasonic Distance Sensor — Sends a sound pulse and measures how long it takes to bounce back. Ultrasonic means the sound is too high for humans to hear.
- IR Sensors — Detect objects using infrared light, which is light your eyes cannot see.
Motor Controllers
A motor controller is a circuit board that sits between the Pico and the motors. The Pico sends small signals, and the motor controller uses the battery power to spin the motors.
You Can Do This!
 Building a robot may look complicated, but you will do it one step at a time. Each lab walks you through every wire and every line of code.
Ready to Build!
 You now know what each robot project does. Pick the Base Bot lab and start your robot journey. You will have a moving robot before you know it!