IR Collision Avoidance Bot
Welcome to the IR Sensor Bot Lab
 In this lab you will give your robot three "eyes" that use invisible light to spot obstacles. Let's wire them up and write the code!
The base robot uses one time-of-flight sensor pointing straight ahead. This robot uses three IR (infrared) sensors — one pointing left, one pointing center, and one pointing right. This gives the robot a much wider view of what is in front of it.
Infrared light is a type of light that your eyes cannot see. The IR sensor sends out a beam of infrared light and checks whether that beam bounces back off an object. If something is close, the sensor returns a LOW signal (0). If nothing is there, it returns a HIGH signal (1).
Purchasing IR Distance Sensors
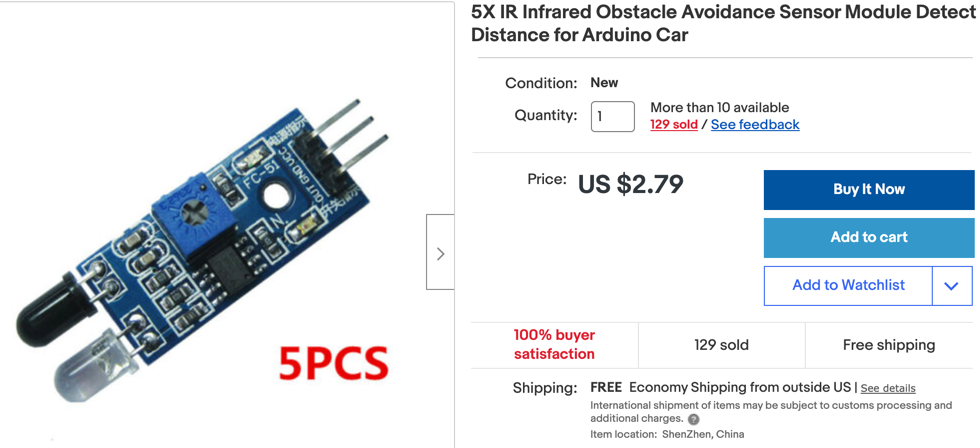
IR distance sensors are very low-cost — often less than a dollar each. Search online for "IR obstacle avoidance sensor module." Buy a set of three so you have one for each side.
Connecting the IR Sensors
You will wire three IR sensors to the Pico. Each sensor has three pins: power (VCC), ground (GND), and signal (OUT). Connect power and ground to the rails on your breadboard. Connect each signal wire to a separate GPIO pin on the Pico.
Here is the code that sets up the three sensor pins:
| # Set up the three IR sensor input pins
left = Pin(8, Pin.IN, Pin.PULL_DOWN) # left sensor on pin 8
center = Pin(7, Pin.IN, Pin.PULL_DOWN) # center sensor on pin 7
right = Pin(6, Pin.IN, Pin.PULL_DOWN) # right sensor on pin 6
|
What each line does
Pin.IN — tells the Pico that this pin reads a signal (input mode)Pin.PULL_DOWN — holds the pin at 0 when nothing is connected, to avoid false readings- The number in
Pin(8, ...) is the GPIO pin number on the Pico
Connecting the Speaker
This robot has an optional speaker on pin 21. The speaker lets you hear what the robot is detecting. It plays a different tone for left, center, or right obstacles, and another tone when the robot drives forward.
The speaker is a small piezoelectric buzzer (a tiny device that makes sound when electricity pulses through it). Connect one wire to GPIO pin 21 and the other wire to any GND pin.
| SPEAKER_PIN = 21
speaker = PWM(Pin(SPEAKER_PIN)) # set up Pulse Width Modulation on the speaker pin
|
What each line does
SPEAKER_PIN = 21 — saves the pin number in a named variable so it is easy to changePWM(Pin(SPEAKER_PIN)) — sets up PWM on that pin (PWM lets you control the sound frequency)
Drive Logic
The three IR sensors go LOW (0) when they detect an object in front of them. Your code checks each sensor and decides what to do:
| while True:
if left.value() == 0: # left sensor detected something
turn_right() # steer away from the obstacle on the left
if center.value() == 0: # center sensor detected something
reverse() # back away from the obstacle straight ahead
if right.value() == 0: # right sensor detected something
turn_left() # steer away from the obstacle on the right
# if all three sensors read HIGH (1), the path is clear
if left.value() and center.value() and right.value():
forward() # drive forward
|
What each line does
left.value() — reads the signal from the left sensor (returns 0 or 1)== 0 — checks if the value is LOW, meaning an obstacle is detected- Each
if block runs a different motor command depending on which sensor fired
Key Idea
 The robot turns away from the side that detects an obstacle. If the left sensor sees something, the robot turns right. If the right sensor sees something, the robot turns left. This keeps the robot from getting stuck.
Full Program
Here is the complete program. It includes the IR sensors, the speaker, and an OLED (Organic Light-Emitting Diode) display that shows which sensors are active.
1
2
3
4
5
6
7
8
9
10
11
12
13
14
15
16
17
18
19
20
21
22
23
24
25
26
27
28
29
30
31
32
33
34
35
36
37
38
39
40
41
42
43
44
45
46
47
48
49
50
51
52
53
54
55
56
57
58
59
60
61
62
63
64
65
66
67
68
69
70
71
72
73
74
75
76
77
78
79
80
81
82
83
84
85
86
87
88
89
90
91
92
93
94
95
96
97
98
99
100
101
102
103
104
105
106
107
108
109
110
111
112
113
114
115
116
117
118
119
120
121
122
123
124
125
126
127
128
129
130
131
132
133
134
135
136
137
138
139
140
141
142
143
144
145
146
147
148
149
150
151
152
153
154
155
156
157
158
159
160
161
162
163
164
165
166
167
168
169 | from machine import Pin, PWM
from utime import sleep
import ssd1306 # driver for the OLED display
import machine
# Motor pin numbers — connect these to your motor driver board
RIGHT_FORWARD_PIN = 17
RIGHT_REVERSE_PIN = 16
LEFT_FORWARD_PIN = 18
LEFT_REVERSE_PIN = 19
# Set up PWM on each motor pin
right_forward = PWM(Pin(RIGHT_FORWARD_PIN))
right_reverse = PWM(Pin(RIGHT_REVERSE_PIN))
left_forward = PWM(Pin(LEFT_FORWARD_PIN))
left_reverse = PWM(Pin(LEFT_REVERSE_PIN))
# Set up the three IR sensor input pins
left = Pin(8, Pin.IN, Pin.PULL_DOWN) # left sensor
center = Pin(7, Pin.IN, Pin.PULL_DOWN) # center sensor
right = Pin(6, Pin.IN, Pin.PULL_DOWN) # right sensor
# Set up the speaker
SPEAKER_PIN = 21
speaker = PWM(Pin(SPEAKER_PIN)) # PWM controls sound pitch
# Set up the OLED display using SPI (Serial Peripheral Interface — another way to connect devices)
WIDTH = 128 # display width in pixels
HEIGHT = 64 # display height in pixels
CS = machine.Pin(1) # chip select pin
SCL = machine.Pin(2) # SPI clock pin
SDA = machine.Pin(3) # SPI data pin
DC = machine.Pin(4) # data/command pin
RES = machine.Pin(5) # reset pin
spi = machine.SPI(0, sck=SCL, mosi=SDA) # set up the SPI bus
oled = ssd1306.SSD1306_SPI(WIDTH, HEIGHT, spi, DC, RES, CS) # create the display object
# --- Motor functions ---
def turn_motor_on(pwm):
pwm.duty_u16(65025) # set full power (65025 is the maximum)
def turn_motor_off(pwm):
pwm.duty_u16(0) # stop the motor
def forward():
turn_motor_on(right_forward)
turn_motor_on(left_forward)
def reverse():
turn_motor_on(right_reverse)
turn_motor_on(left_reverse)
def turn_right():
turn_motor_on(right_forward)
turn_motor_on(left_reverse)
def turn_left():
turn_motor_on(right_reverse)
turn_motor_on(left_forward)
# --- Speaker functions ---
def sound_off():
speaker.duty_u16(0) # silence the speaker
def left_tone():
speaker.duty_u16(1000) # set volume
speaker.freq(700) # set pitch to 700 Hz (a medium-high tone)
sleep(0.5) # play for half a second
sound_off() # then silence
def center_tone():
speaker.duty_u16(1000)
speaker.freq(900) # higher pitch for the center sensor
sleep(0.5)
sound_off()
def right_tone():
speaker.duty_u16(1000)
speaker.freq(600) # lower pitch for the right sensor
sleep(0.5)
sound_off()
def forward_tone():
speaker.duty_u16(1000)
speaker.freq(400) # rising three-note sound when going forward
sleep(0.1)
speaker.freq(900)
sleep(0.1)
speaker.freq(1200)
sleep(0.1)
sound_off()
# --- Display function ---
def update_oled():
"""Draw sensor readings on the OLED screen."""
oled.fill(0) # clear the screen (fill with black)
oled.text("CoderDojo Rocks!", 0, 0, 1) # title text
# Show each sensor value as a number
oled.text("Left:", 0, 10, 1)
oled.text(str(left.value()), 50, 10, 1) # show 0 or 1
oled.text("Center:", 0, 20, 1)
oled.text(str(center.value()), 60, 20, 1)
oled.text("Right:", 0, 30, 1)
oled.text(str(right.value()), 55, 30, 1)
# Draw a filled box at the bottom for each sensor that detects something
BAR_WIDTH = 40
BAR_HEIGHT = 20
if left.value():
oled.fill_rect(WIDTH - 40, 50, BAR_WIDTH, BAR_HEIGHT, 0) # clear box (no obstacle)
else:
oled.fill_rect(WIDTH - 40, 50, BAR_WIDTH, BAR_HEIGHT, 1) # filled box (obstacle!)
if center.value():
oled.fill_rect(50, 50, BAR_WIDTH, BAR_HEIGHT, 0)
else:
oled.fill_rect(50, 50, BAR_WIDTH, BAR_HEIGHT, 1)
if right.value():
oled.fill_rect(0, 50, BAR_WIDTH, BAR_HEIGHT, 0)
else:
oled.fill_rect(0, 50, BAR_WIDTH, BAR_HEIGHT, 1)
oled.show() # send the drawing to the screen
# --- Main loop ---
# drive_state tracks what the robot is doing:
# 0 = stopped, 1 = forward, 2 = turning right, 3 = turning left
drive_state = 0
counter = 0
while True:
if left.value() == 0: # left sensor sees an obstacle
print('Left')
turn_right() # steer away from the left obstacle
update_oled()
drive_state = 2
if center.value() == 0: # center sensor sees an obstacle
print('Center')
center_tone() # play a warning sound
reverse() # back up
update_oled()
drive_state = 0
if right.value() == 0: # right sensor sees an obstacle
print('Right')
turn_left() # steer away from the right obstacle
update_oled()
drive_state = 3
# All three sensors clear — drive forward
if left.value() and center.value() and right.value():
print('Go forward!')
drive_state = 1
forward()
update_oled()
print("counter: ", counter) # print a loop count so you can see the program is running
counter += 1 # add 1 to the counter each loop
sleep(0.25) # short pause before checking sensors again
|
The IR sensor signal pins are GP6, GP7, GP8, and GP9 on the Pico.
Monty's Tip
 Test each IR sensor one at a time before running the full program. Hold your hand in front of each sensor and check that the correct value changes in the console. This makes it much easier to find wiring mistakes.
Excellent Work!
 Your robot now has three sensors watching for obstacles on the left, center, and right. It can react differently depending on which side an obstacle appears. Next, try the Rainbow Bot to add color to your robot!