Eight-Key Piano
Welcome to the Piano Lab
 In this lab, you will wire up eight buttons and turn your Pico into a real playable piano! Press a button and hear a note.
Parts You Will Need
- A Raspberry Pi Pico
- A standard-size breadboard (or two half-size breadboards)
- 8 momentary push buttons
- A speaker or a piezo buzzer
- (Optional) A small sound amplifier such as the LM386 DC 5V-12V Mini Micro Audio Amplifier for under $2. In a quiet room you may not need it.
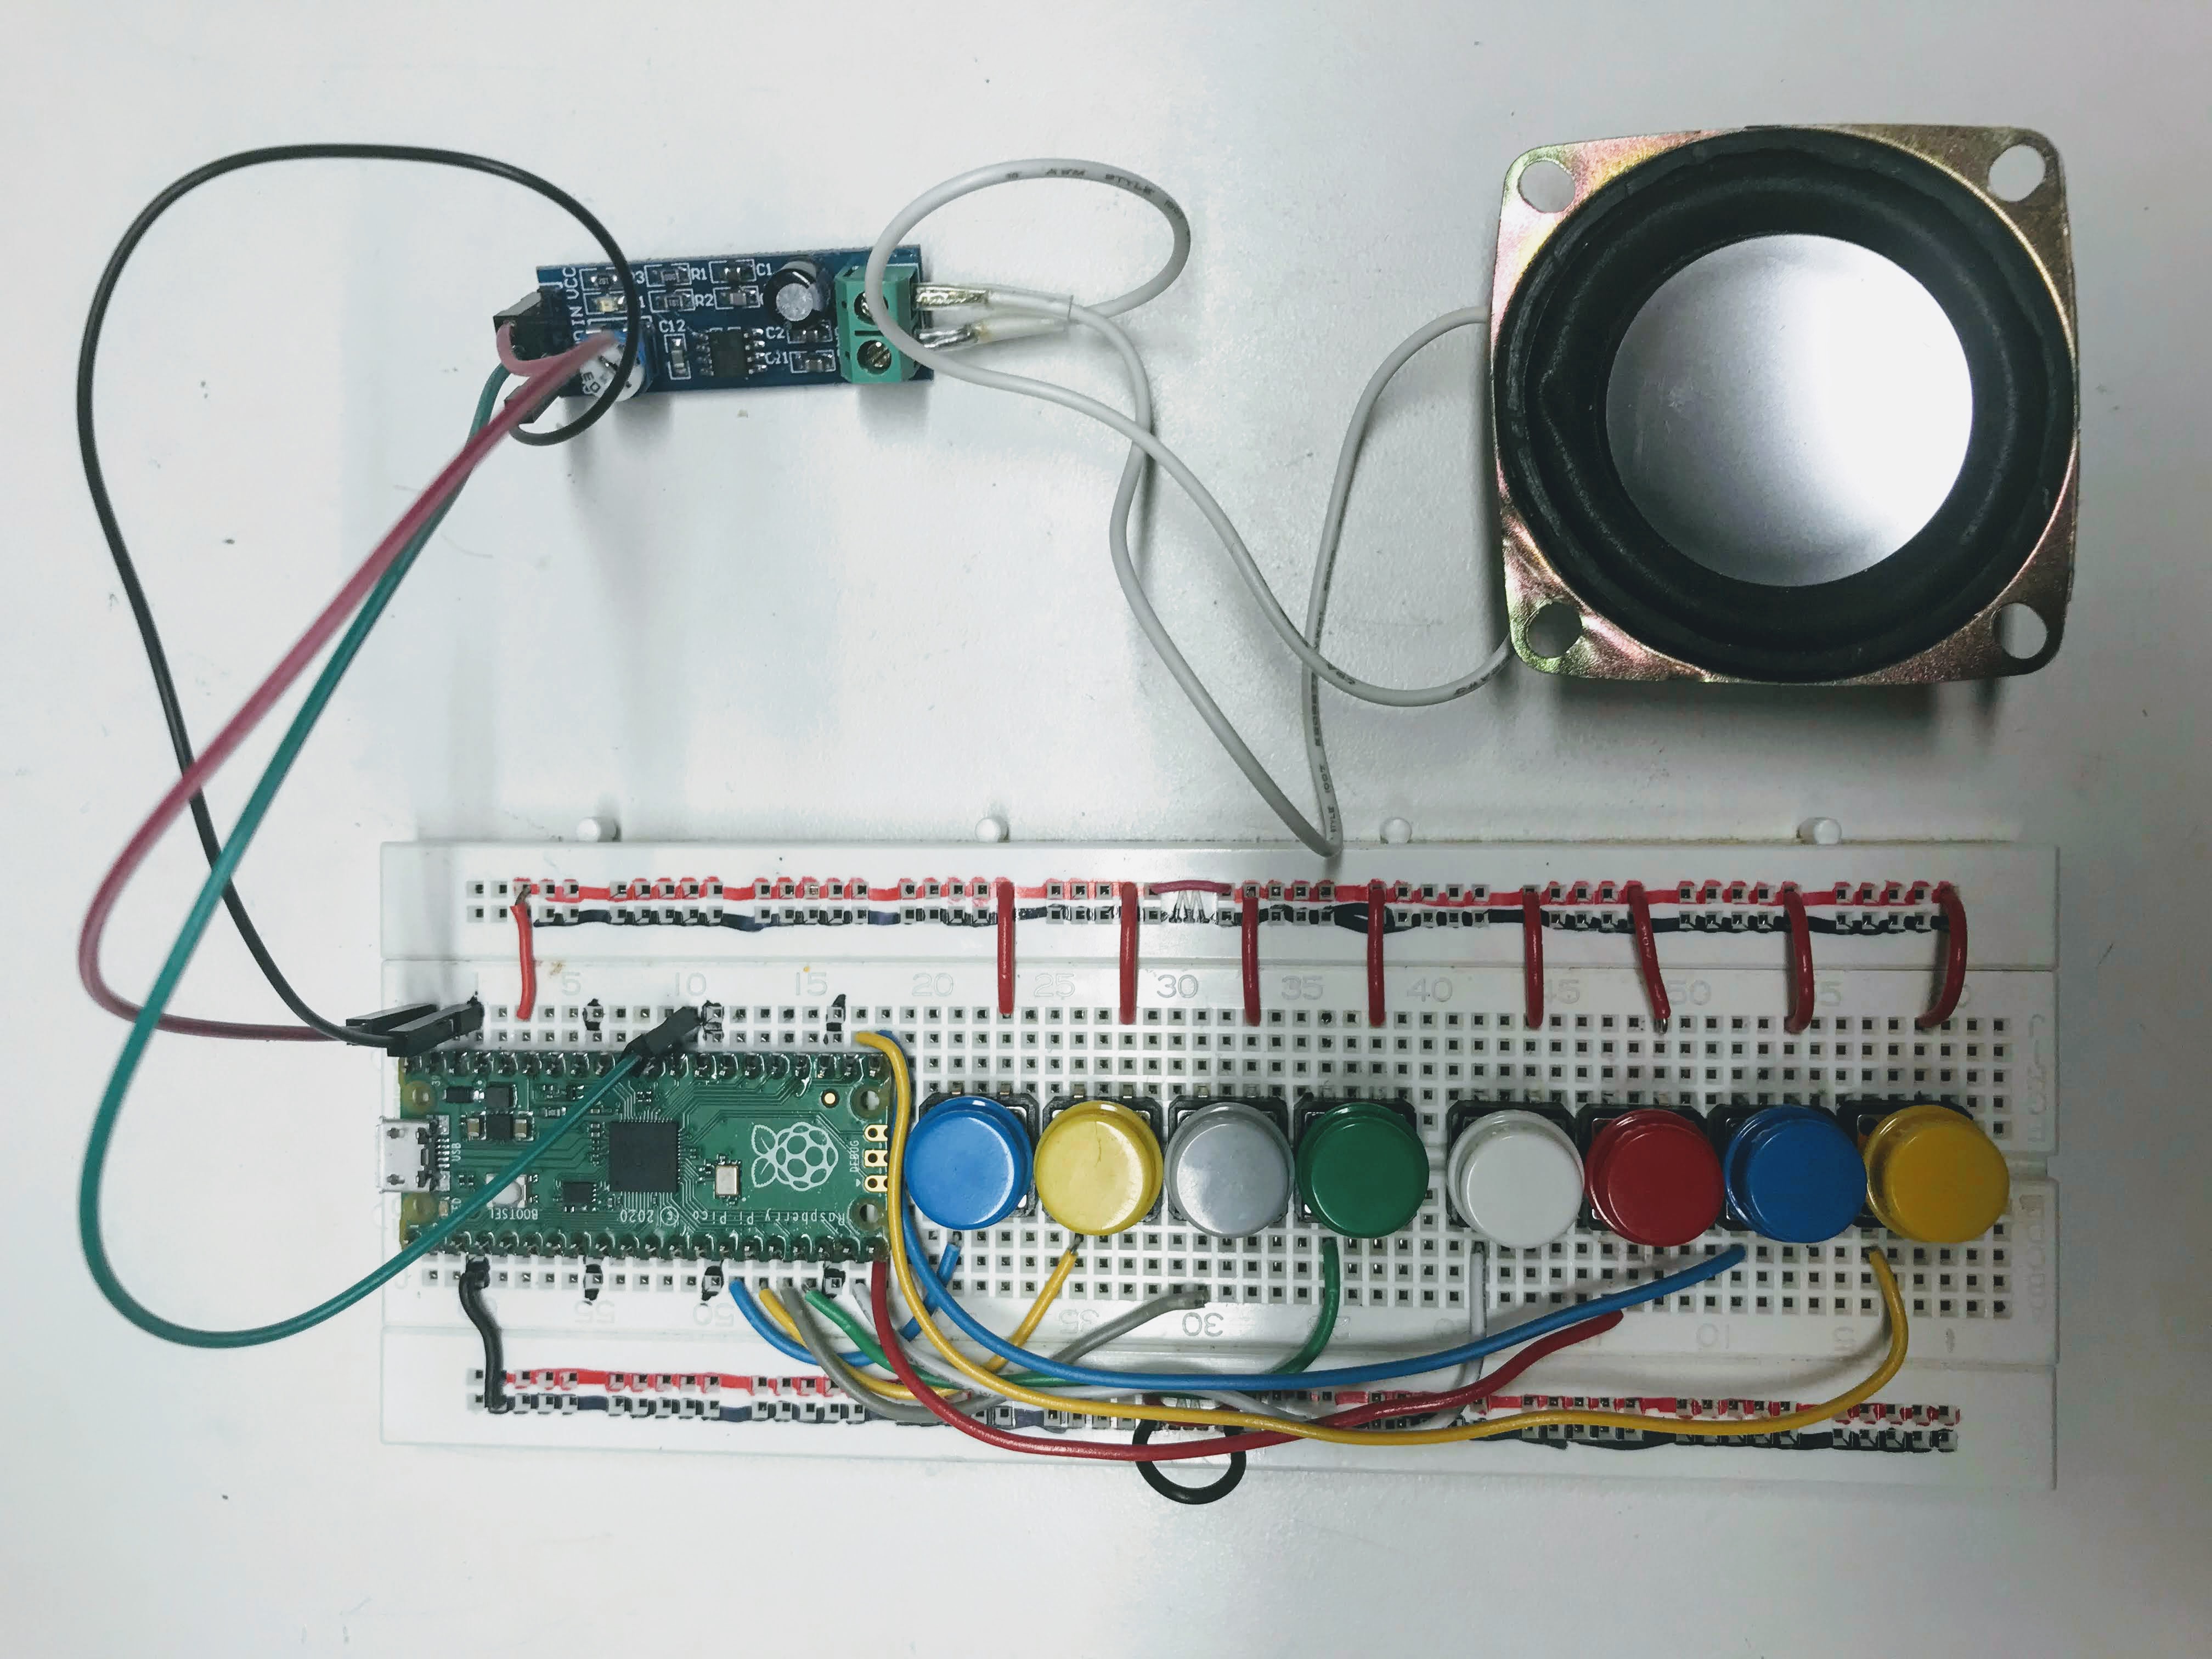
How the Buttons Are Wired
Each button connects one GPIO pin to the 3.3 V rail on the breadboard. When you press the button, the pin reads HIGH (1). When you release it, the pin reads LOW (0).
You do not need external resistors. You set each pin to use an internal pull-down resistor in code:
1 | |
This means the pin is always pulled to 0 V (LOW) until a button press connects it to 3.3 V (HIGH).
The Play-Tone Functions
Two functions handle all the sound:
1 2 3 4 5 6 7 8 | |
To check if a button is pressed, you read the pin's value:
1 2 | |
Key Idea
 The eight notes go from A3 (220 Hz) up to A4 (440 Hz). A4 is exactly twice the frequency of A3 — that is one octave higher. Each step in between is a note in the musical scale.
Full Program
1 2 3 4 5 6 7 8 9 10 11 12 13 14 15 16 17 18 19 20 21 22 23 24 25 26 27 28 29 30 31 32 33 34 35 36 37 38 39 40 41 42 43 44 45 46 47 48 49 50 | |
What Each Section Does
SPEAKER_PIN = 22— the GPIO pin number where the speaker is connected.machine.Pin.PULL_DOWN— sets each button pin to use an internal pull-down resistor.while True:— loops forever, checking all eight buttons every cycle.elif— checks each button in order. Only the first pressed button gets to play.else: be_quiet()— if no button is pressed, turn the sound off.
Monty's Tip
 The built-in LED on pin 25 lights up while any note is playing. This gives you a visual sign that the circuit is working even if you cannot hear anything.
Exercises
- Rewrite the code using two lists — one for pin numbers and one for note frequencies. Use a loop to check each button.
- Try different note frequencies to play other musical scales (minor scale, pentatonic scale).
- Add a ninth button that shifts all the notes up one octave by doubling their frequencies.
- Connect an OLED display and show the name of the note being played on screen.
- Print the time each note is pressed and the length of the pauses between notes.
- Save the sequence of notes to a file so you can play it back later.
- Add a simple menu: start a new recording, save it, or play it back.
- Eight keys are not enough for many songs. Use two full-size breadboards to add more keys.
- Look into a small MIDI keyboard such as the 32-key $40 MIDIPLUS AKM320 USB MIDI Keyboard Controller.
- Read about running Musical Instrument Digital Interface (MIDI) on the Pico: MIDI, MicroPython and the Raspberry Pi Pico.
Great Work!
 You built a real playable instrument! Next, you will learn how to play full audio files stored on the Pico's memory.