BME280 Temperature, Humidity, and Pressure Sensor
Welcome to the BME280 Sensor Lab
 The BME280 is a tiny sensor that measures three things at once: temperature,
humidity, and air pressure. One small chip — three readings! Let's build
something amazing!
The BME280 is a tiny sensor that measures three things at once: temperature,
humidity, and air pressure. One small chip — three readings! Let's build
something amazing!
What Is the BME280?
The BME280 is a precision environmental sensor made by Bosch. It measures:
- Temperature — in degrees Celsius, accurate to ±1°C
- Relative humidity — as a percentage, accurate to ±3%
- Air pressure — in hectopascals (hPa), accurate to ±1 hPa
It connects to the Pico using I2C — just four wires. The sensor costs about $2–$4.
Key Idea
 The BMP280 is a similar but cheaper sensor that only measures temperature
and pressure — it does not measure humidity. Make sure your module says
BME280, not BMP280, if you need humidity readings.
The BMP280 is a similar but cheaper sensor that only measures temperature
and pressure — it does not measure humidity. Make sure your module says
BME280, not BMP280, if you need humidity readings.
Parts You Need
| Part | Quantity | Approximate Cost |
|---|---|---|
| Raspberry Pi Pico | 1 | $4 |
| BME280 I2C module | 1 | $2–$4 |
| Solderless breadboard | 1 | $3 |
| Jumper wires | 4 | — |
Wiring Steps
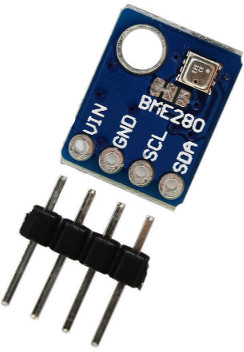
The BME280 module has four pins. Connect them to the Pico like this:
- Connect GND on the BME280 to any GND pin on the Pico.
- Connect VCC on the BME280 to the 3.3 V (pin 36) on the Pico.
- Connect SCL on the BME280 to GP1 on the Pico.
- Connect SDA on the BME280 to GP0 on the Pico.
| BME280 Pin | Pico Pin | Signal |
|---|---|---|
| GND | GND | Ground |
| VCC | 3V3 (pin 36) | 3.3 V power |
| SCL | GP1 | I2C clock |
| SDA | GP0 | I2C data |
Install the BME280 Library
The Pico does not include a BME280 library by default. You need to copy the driver file to your Pico before running the sample code.
- Download
bme280.pyfrom the micropython-bme280 repository. - Open Thonny and connect your Pico.
- Use File → Save as to save
bme280.pydirectly onto the Pico.
I2C Scanner (Check Your Wiring)
Run this first to confirm the sensor is connected correctly:
1 2 3 4 5 6 7 8 | |
You should see 0x76 (decimal 118) or 0x77 (decimal 119) in the output.
If you see nothing, check your wiring and make sure VCC is connected to 3.3 V.
Reading the Sensor
1 2 3 4 5 6 7 8 9 10 11 12 13 14 15 16 17 18 | |
What Each Line Does
| Line | Purpose |
|---|---|
I2C(0, sda=Pin(0), scl=Pin(1)) |
Creates I2C bus 0 on GP0 and GP1 |
bme280.BME280(i2c=i2c) |
Connects to the BME280 at its default address |
sensor.read_compensated_data() |
Reads all three measurements at once |
temperature / 100 |
Scales the raw integer to degrees Celsius |
pressure / 256 / 100 |
Scales the raw integer to hectopascals |
humidity / 1024 |
Scales the raw integer to a percentage |
Monty's Tip
 Air pressure changes with altitude. If you carry the sensor upstairs, the
pressure reading will drop slightly. This is how smartphones know which
floor of a building you are on!
Air pressure changes with altitude. If you carry the sensor upstairs, the
pressure reading will drop slightly. This is how smartphones know which
floor of a building you are on!
Logging Sensor Data
This loop reads the sensor every 5 seconds and prints a timestamp with each reading — useful for tracking weather changes over time:
1 2 3 4 5 6 7 8 9 10 11 12 13 14 15 16 17 | |
Great Work!
 You are now reading three environmental measurements with one tiny sensor!
Next, try displaying the readings on an OLED screen so you can build
your own portable weather station.
You are now reading three environmental measurements with one tiny sensor!
Next, try displaying the readings on an OLED screen so you can build
your own portable weather station.