CU1609C LED Display
Welcome to the UC1609 Display Lab
 In this lab, you will learn about a low-cost graphic display that uses the UC1609 driver chip. This is a great display for robot projects because it is affordable and easy to read!
Note: This lab is a work in progress. We have not yet found a working MicroPython driver for this display. This page documents what we know so far and shows the direction we are heading.
What Is This Display?
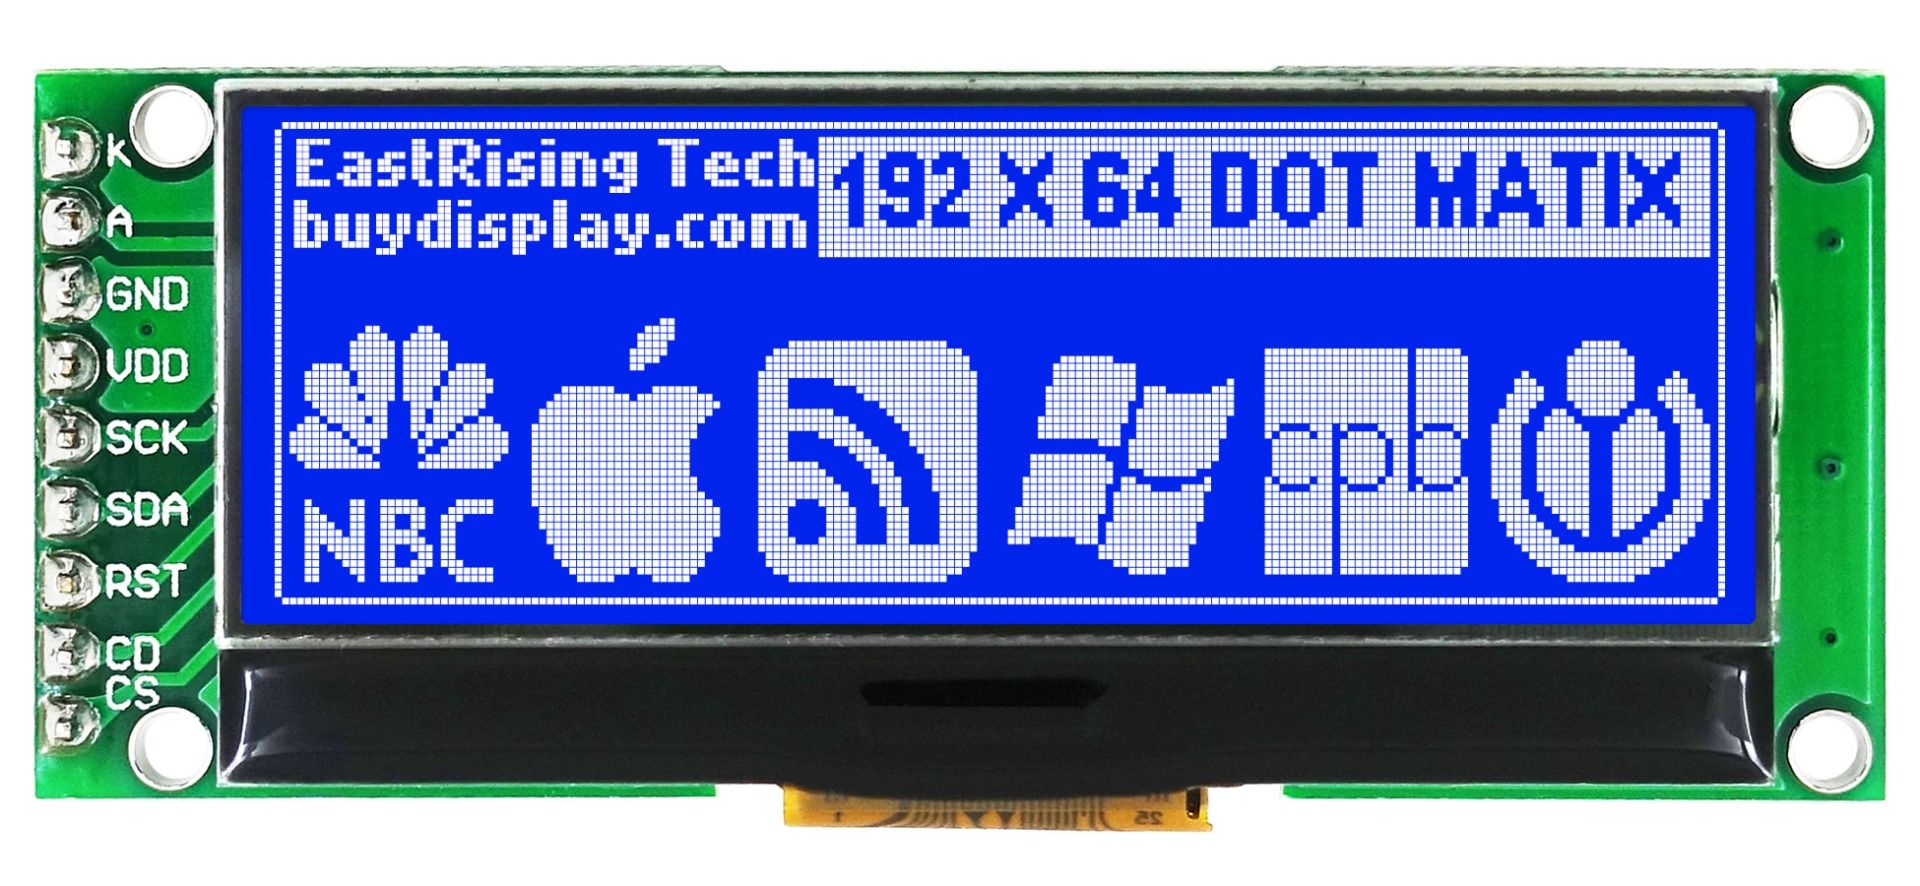
The UC1609C is a Liquid Crystal Display (LCD) driver chip. An LCD driver chip controls the tiny dots (pixels) on the screen. This chip uses a Serial Peripheral Interface (SPI) connection to talk to the Pico.
The display is 2 inches wide and shows 192 pixels across and 62 pixels tall. It costs about $4, which makes it one of the most affordable graphic displays you can buy.
What Is a Graphic Display?
 A graphic display can draw any pattern of dots on the screen — not just letters. This lets you draw lines, shapes, and pictures, not just text.
Connections
This display has 9 pins. Here is what each one does and where to connect it:
| Pin | Name | Description |
|---|---|---|
| 1 | K — Backlight Cathode | Connect to the GND rail |
| 2 | A — Backlight Anode | Connect through a 200 ohm resistor to the 3.3V rail. This limits the backlight current to about 3 milliamps. The maximum backlight current is 20 milliamps. |
| 3 | GND — Ground | Connect to the GND rail |
| 4 | VDD — Power Supply | Connect to the +3.3V rail |
| 5 | SCK — Serial Clock | Connect to the SPI CLK pin on the Pico |
| 6 | SDA — Serial Data | Connect to the SPI MOSI pin on the Pico |
| 7 | RST — Reset | Connect to the 3.3V rail |
| 8 | CD — Command or Data | Connect to any GPIO pin on the Pico |
| 9 | CS — Chip Select | Connect to GND when the display is in use |
Connection Notes
The RST (reset) pin resets all settings inside the chip when it goes Low. The UC1609C chip has a built-in power-on reset, so the RST pin is not required for the chip to work. If you are not using RST, connect it to the High (3.3V) rail.
The CD pin tells the display if the Pico is sending a command or display data:
- When CD = High: the Pico is sending display data (pixels)
- When CD = Low: the Pico is sending a command
The CS pin selects which device on the SPI bus is active. Connect CS to GND to keep the display always selected (when it is the only SPI device).
Watch Out!
 Always use a resistor on the backlight anode pin. Without the resistor, too much current flows through the backlight LED and it can burn out quickly.
Hello World Code (Work in Progress)
This code sets up the SPI connection. A full driver is not yet available in MicroPython.
1 2 3 4 5 6 7 8 9 10 11 12 13 | |
What Each Line Does
from machine import Pin, SPI— loads the tools for GPIO pins and SPI communication.SPI_CLK = 2— names GP2 as the clock pin so the code is easier to read.SPI_SDA = 3— names GP3 as the data pin.CD = 5— names GP5 as the command/data select pin.spi = SPI(0, baudrate=31250000, ...)— starts SPI bus 0 at 31.25 million bits per second.print(spi)— prints the SPI settings to the console so you can confirm it started correctly.
Similar Drivers to Study
No MicroPython driver exists for the UC1609 yet. But two similar drivers are close to what is needed:
MicroPython LCD160CR Driver
The MicroPython project includes a driver for the LCD160CR display. It uses a similar communication pattern to the UC1609.
LCD160CR Display Driver on GitHub
Gavin Lyons's Arduino C Driver
Gavin Lyons wrote an Arduino C driver for the UC1609 that has been available for many years. It has a lot of drawing functions already working.
Gavin Lyons GitHub Repo for the UC1609
Our goal is to port Gavin's C code into MicroPython using the same function style as the LCD160CR driver.
You Can Do This!
 Porting a driver from C to MicroPython is an advanced challenge. Even reading through the C code to understand how the display works is great practice. Every expert started where you are now!
References
- BuyDisplay Product — 2 inch Blue 192x64 Graphic LCD, UC1609, SPI — about $3.48
- ERM19264-4 Series Graphic Display Module Datasheet (PDF)
- Gavin Lyons GitHub Repo for the UC1609
- eBay Product — 2 inch White 192x64 Graphic LCD, UC1609, SPI
- MicroPython Pyboard LCD Class
- List of LCD Graphic Displays — Awesome MicroPython
Great Work!
 You learned about a low-cost SPI graphic display and how to set up its connections. When a full MicroPython driver is available, you will be ready to use it right away!