Controlling a Stepper Motor with MicroPython
Welcome to the Stepper Motor Lab
 Stepper motors move in tiny, exact steps. They are used in 3D printers, CNC machines, and robots that need to move to a precise position. Let's learn how they work!
What Is a Stepper Motor?
A stepper motor is a specialized motor that rotates in small, exact steps. Instead of spinning freely like a DC motor, a stepper motor moves one step at a time. Each step rotates the shaft by a fixed angle.
For example, a common stepper motor moves 1.8 degrees per step. That means it takes 200 steps to spin the shaft one full turn (200 × 1.8° = 360°).
Stepper motors are used to carefully position objects that move along an axis. For example, a 3D printer uses stepper motors to move the print head left, right, forward, and backward with great precision. Stepper motors are also more expensive than DC hobby motors or mini servos, so they are used in projects where precise movement matters most.
Key Idea
 A stepper motor has several electromagnets inside. You energize them one at a time in a sequence. Each energized magnet pulls the shaft a tiny bit. Do this in order, and the shaft turns steadily and precisely.
How Stepper Motors Work
Inside a stepper motor there are multiple electromagnets arranged in a ring. The shaft has magnets on it too. When you turn on one electromagnet, it pulls the shaft toward it. When you turn on the next electromagnet, the shaft moves to that one. This sequence of steps is called a step sequence.
There are two common step sequences:
- Full step: You energize one coil at a time. The motor moves in full steps.
- Half step: You energize two coils at a time, alternating. The motor moves in smaller, smoother steps.
What You Need
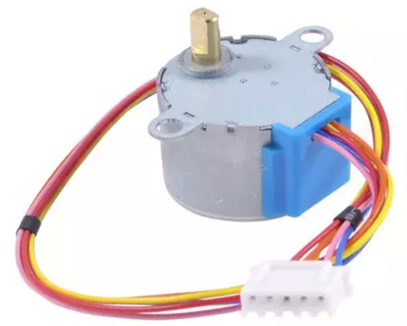
- A 28BYJ-48 stepper motor — a common, inexpensive stepper that works at 5 V
- A ULN2003 driver board — this takes your Pico's signals and provides enough power to drive the motor coils
- A Raspberry Pi Pico and USB cable
- 4 jumper wires to connect the driver to the Pico
Wiring Steps
Connect the ULN2003 driver board to the Pico like this:
- Plug the stepper motor's connector into the ULN2003 driver board.
- Connect the driver board's IN1 pin to Pico GP15.
- Connect the driver board's IN2 pin to Pico GP14.
- Connect the driver board's IN3 pin to Pico GP16.
- Connect the driver board's IN4 pin to Pico GP17.
- Connect the driver board's VCC pin to Pico VBUS (5 V from USB).
- Connect the driver board's GND pin to Pico GND.
Watch Out!
 Stepper motors draw more current than a Pico pin can supply. Always use a driver board like the ULN2003. Never connect a stepper coil directly to a GPIO pin.
Sample Code
The code below sends a full step sequence to the stepper motor. This energizes one coil at a time, in order, to rotate the shaft.
1 2 3 4 5 6 7 8 9 10 11 12 13 14 15 16 17 18 19 20 21 22 23 24 25 26 27 | |
What Each Line Does
| Line | Purpose |
|---|---|
Pin(15, Pin.OUT) |
Sets up GP15 as an output pin to control one motor coil |
motor_pins = [...] |
Groups all four coil pins into a list for easy looping |
full_step_sequence |
A list of four steps — each step turns on one coil |
[1, 0, 0, 0] |
Step 1: coil 1 is ON, all others are OFF |
for single_step in full_step_sequence |
Loops through each of the four steps |
motor_pins[pin_index].value(...) |
Turns each coil pin on or off for the current step |
utime.sleep_ms(1) |
Waits 1 millisecond — increase this number to slow the motor down |
Changing the Speed
The speed of a stepper motor depends on how long you wait between steps. Change utime.sleep_ms(1) to control speed:
utime.sleep_ms(1)→ fast (1 ms between steps)utime.sleep_ms(5)→ medium speedutime.sleep_ms(20)→ slow and easy to watch
Monty's Tip
 If the motor vibrates but does not turn, your wiring order might be wrong. Try swapping IN1 and IN3, or check that each pin in
 motor_pins matches the right connector on the driver board.
Reversing the Direction
To spin the motor backward, reverse the step sequence:
1 2 3 4 5 6 7 | |
Just replace full_step_sequence with reverse_step_sequence in the loop to spin backward.
References
- Wikipedia Page on Stepper Motors
- Raspberry Pi L293D Example
- YoungWonks Stepper Motor Example with Pico
Fantastic Work!
 You can now control a stepper motor with MicroPython! Stepper motors are used in 3D printers, robotic arms, and CNC machines. You just learned a skill that real engineers use every day.