Lab 06: Test the Buttons
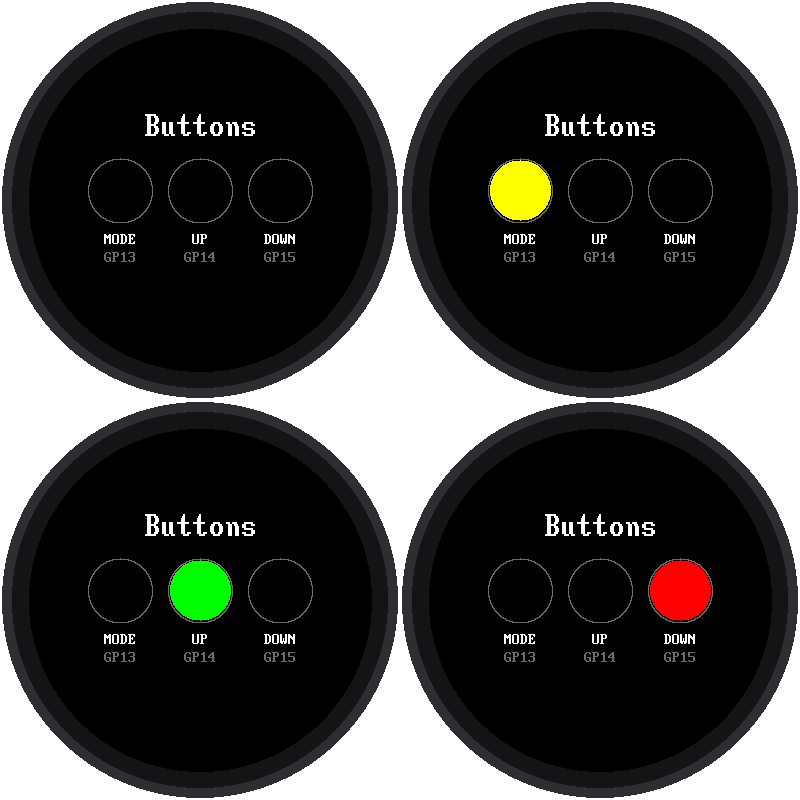
Your watch has three buttons: MODE, UP, and DOWN. Before you write programs that use them, this lab checks that each one is wired correctly. Each circle on the screen lights up while you hold its button down.
Welcome to Lab 06
 Up to now, your watch has only talked. With buttons, it can listen!
Every lab after this one uses them, so a quick test now saves a lot of
head-scratching later. Let's make time tick!
Up to now, your watch has only talked. With buttons, it can listen!
Every lab after this one uses them, so a quick test now saves a lot of
head-scratching later. Let's make time tick!
What You Will Learn
- how the Pico reads a button
- what a pull-up is, and why a pressed button reads 0
- why programs remember what they drew last
Run It
Open 06-button-test.py in Thonny and click Run. Press each button
one at a time:
| Button | Pico pin | Circle lights up |
|---|---|---|
| MODE | GP13 | yellow |
| UP | GP14 | green |
| DOWN | GP15 | red |
Thonny's shell also prints a line each time, like UP pressed and
UP released.
How a Button Talks to the Pico
A button is just a switch. When you press it, it connects its pin to GND (ground). But what does the pin read when the button is not pressed? Without help, nothing is connected, and the pin would read random 0s and 1s, like a radio tuned between stations.
So the program turns on the Pico's pull-up: a tiny built-in connection that gently pulls the pin up to 1. Pressing the button connects the pin straight to ground, which wins, so the pin reads 0.
| Button is... | Pin reads |
|---|---|
| not pressed | 1 |
| pressed | 0 |
It seems backwards, but it's how almost every button on every gadget works. That's why the program checks for 0:
1 | |
Only Draw When Something Changes
The program checks all three buttons 50 times a second. Redrawing three
circles 50 times a second would keep the display busy for nothing. So the
program remembers what each button looked like last time, in a list
called last, and only redraws a circle when its button changes:
1 2 3 4 | |
!= means "is not equal to." You'll see this trick, remember what you
drew and only redraw what changed, in almost every lab from now on.
Try This
- Press two buttons at once. Does the program handle it?
- Change the colors in the list called
BUTTONSnear the top of the program. - Add a counter that prints how many times UP has been pressed.
If It Doesn't Work
- A circle never lights up. That button isn't connected. An unconnected button reads 1, "not pressed," forever. Check that one leg goes to the right pin and the other leg goes to GND.
- A circle is lit even when you're not touching anything. That pin is connected straight to ground. Check for a wire in the wrong row of the breadboard.
Buttons Tested!
 You now know why a pressed button reads 0, and how to redraw only when
something changes. Next, you'll use these buttons to set the time by
hand.
You now know why a pressed button reads 0, and how to redraw only when
something changes. Next, you'll use these buttons to set the time by
hand.