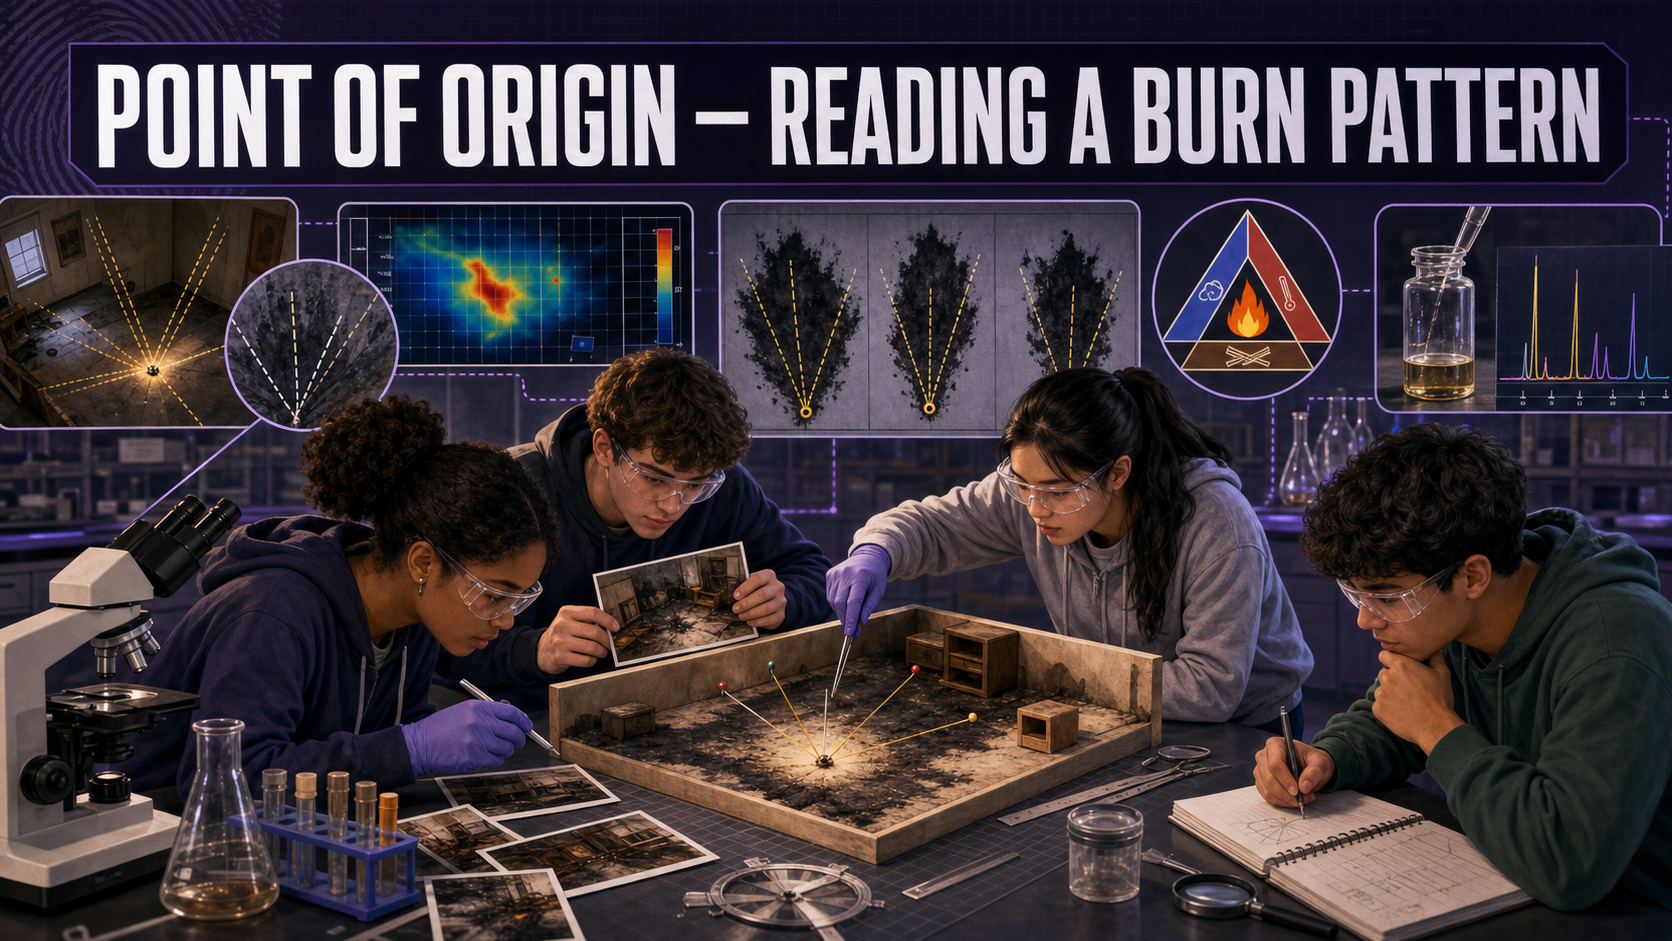
Point of Origin — Reading a Burn Pattern
Welcome, Investigators!

A fire tells a story if you know how to read the scars it leaves behind. Flames climb, char deepens, and every burn points a finger back toward where it all began. Today you'll do it the safe way — no matches, just evidence — and decide whether this fire was an accident or a crime. Follow the evidence!
The Case
At 2:14 a.m. a fire tore through the storeroom of a shuttered electronics shop. By the time crews knocked it down, the room was gutted. The owner's insurance claim is large, recent, and the business was losing money. The fire marshal hands your team a set of scene photographs and one question:
Where did this fire start — and did it start on its own?
You will not strike a single match. Fire is far too dangerous for a classroom. Instead you'll analyze burn-pattern evidence in the photos: V-patterns on the walls, spalling on the concrete, and irregular pour-pattern char on the floor. You'll trace those indicators back to the point of origin, decide whether the fire was accidental or set, flag where an accelerant was likely used, and justify every claim with the fire tetrahedron.
Learning Objectives
By the end of this investigation you will be able to:
- Identify V-patterns, spalling, and pour patterns in fire-scene evidence.
- Trace burn indicators back to a fire's point of origin.
- Differentiate accidental fires from set fires using origin and pattern evidence.
- Justify an accelerant hypothesis using the fire tetrahedron and the need for lab confirmation.
Quick Facts
| Lab type | 💻 Virtual |
| Group size | 2–3 investigators |
| Time | 45–55 minutes |
| Cost | $0 (needs a computer) |
| Ties to | Ch 10 — Fire Tetrahedron, Arson Investigation, Accelerant Pour Patterns, Multiple Points of Origin, V-Pattern Burn Indicators, Spalling |
Materials
Per group (no consumables):
- A computer or tablet with a web browser
- The provided scene-photograph set (walls, floor, and doorway views with scale references)
- The Burn-Pattern Origin Explorer MicroSim (specified below) or a printed room diagram to mark up
- Your lab notebook and a colored pencil or on-screen annotation tool
Read the Scars, Don't Trust the Myths

Old-school "arson indicators" have burned a lot of innocent people. Since the 2009 reforms to fire science, investigators know that a full-room flashover can leave floor char that looks like a poured accelerant. A burn pattern is a lead, not a verdict — an accelerant claim isn't confirmed until the lab finds ignitable-liquid residue.
Background: How Fire Writes Its History
A fire needs four things at once: fuel, oxygen, heat, and an uninhibited chemical chain reaction. Together these are the fire tetrahedron — remove any one face and the fire dies. Understanding the tetrahedron is how you reason about where a fire could start and what could keep it going.
Fire moves in a predictable way: hot gases are buoyant, so flames climb up and out, scorching a vertical surface into a V-pattern (or an inverted cone) whose narrow apex points down toward the origin — usually the lowest, most-damaged spot in the room. On concrete, intense heat can chip and pit the surface, called spalling. On floors, an irregular, puddle-shaped pour pattern of deep char may mark where a liquid accelerant was spread.
Here's the catch modern investigators live by: those same patterns can be faked by nature. Burning debris and post-flashover conditions can mimic a pour pattern. So the strongest arson evidence isn't one dramatic burn — it's the geometry: an origin low on the floor, or multiple separate origins with no burn path connecting them (fire can't teleport, so two unconnected origins scream set). Any accelerant call must then be confirmed in the lab.
Explore: Trace the Fire to Its Origin
Read the V-patterns and char in a top-down room plan, drop your point of origin, and let the sim score how close you got — then reveal whether a second origin raises the arson red flag.
Burn-Pattern Origin Explorer Interactive MicroSim
Type: microsim
sim-id: burn-pattern-origin-explorer
Library: p5.js
Status: Implemented
Learning Objective: Locate a fire's point of origin from burn-severity evidence and flag multiple origins as an arson indicator (Bloom Level 4 — Analyze).
Explore: From Debris to Chromatogram
Once you flag a spot as a likely accelerant pour, a real investigator bags the charred debris and sends it to the lab. Meet the instrument workflow that waits at the end of your trail.
Headspace SPME → GC-MS Workflow MicroSim
Type: microsim
sim-id: headspace-spme-workflow
Library: p5.js
Status: Specified
Learning Objective: Explain how headspace solid-phase microextraction recovers volatile accelerant residues from arson debris and connects to GC-MS identification (Bloom Level 2 — Understand).
Walk the five stations — sealed can, accumulating vapors, SPME extraction, GC-MS injection, and the matched chromatogram. This is what turns your "accelerant likely used here" hypothesis into a confirmed finding. A burn pattern points; the chromatogram proves.
Procedure
Part 1 — Catalog the burn indicators.
- Study each scene photo in order. For every photo, name the burn indicator you see — V-pattern, spalling, pour pattern, or general char.
- For each indicator, note which direction it points or where it sits in the room. V-pattern apexes point down and toward the origin.
Part 2 — Locate the origin.
- In the Origin Explorer (or on the printed diagram), drag the burn-severity probes to find the deepest, lowest damage. Mark your suspected point of origin there.
- Run the time-lapse slider and check: does a fire starting at your marked origin produce the pattern the photos show? Adjust your marker if it doesn't.
- Look hard for a second origin. Are there two separate burned areas with no char path connecting them? Record how many genuine origins you find.
Part 3 — Rule on cause and accelerant.
- Decide: accidental or set? Base it on the origin location, the number of origins, and whether the burn geometry makes physical sense.
- If you suspect an accelerant, mark where on the diagram, then name the fire-tetrahedron face that accelerant supplied (fuel) and why it would speed the fire.
- State clearly that the accelerant call is a hypothesis until the headspace-SPME → GC-MS lab confirms ignitable-liquid residue.
Data Collection
Fill in one row per photo, then complete the ruling.
| Photo # | Burn indicator | Points toward / location | What it suggests |
|---|---|---|---|
| 1 | |||
| 2 | |||
| 3 | |||
| 4 | |||
| 5 |
| Suspected origin (location) | # of origins found | Accidental or set? | Accelerant suspected? Where? |
|---|---|---|---|
Analysis Questions
- Which single indicator did the most to fix your point of origin, and how did the V-pattern apex help you point to it?
- Explain how finding two unconnected origins would change your ruling from accidental to set. Why can't a single fire produce two separated origins on its own?
- Using the fire tetrahedron, explain what an accelerant contributes and why that would make a fire grow faster and hotter than an accidental one.
- The scene showed floor char that looked like a poured accelerant. Give one innocent, non-arson explanation for that pattern, and state what lab result you'd need before calling it accelerant.
- Why is a burn pattern alone not enough to convict someone of arson? Reference the 2009 reforms and the role of GC-MS confirmation in your answer.
Deliverable
Turn in an annotated scene diagram marking your point(s) of origin and any suspected accelerant location, plus a one-page Origin & Cause Report that states your ruling (accidental or set), the burn evidence behind it, the fire-tetrahedron reasoning, and the lab test you would order to confirm an accelerant.
What Does the Data Tell Us?

The most honest fire investigator in the world says "the evidence is consistent with a set fire," never "this proves arson." A V-pattern points; two origins strongly suggest; only the lab confirms. Hold that line and you'll never be the reason an innocent person takes the fall.
Extension Challenge: The Flashover Trap
Research flashover — the moment an entire room ignites at once. Explain how flashover can erase the very burn-pattern clues you relied on, and how a late-arriving fire that reached flashover might disguise its own origin. Rewrite one of your conclusions to account for the possibility of flashover.
Teacher Notes
Setup, timing, and grading (click to expand)
- Prep: Assemble a 5–8 image scene set (AI-generated or licensed fire
training photos) that clearly shows a V-pattern, spalling, and an irregular
floor char, with an origin low in one corner. Prepare a printed top-down
room diagram as the fallback until
burn-pattern-origin-explorerships. - Two versions: For a "clearly accidental" set, give one origin near an overloaded outlet. For a "set" set, add a second, unconnected origin — this is the single most important teaching move in the lab.
- Accuracy matters here. Fire science was seriously reformed after 2009; make sure students leave saying "consistent with," never "proves," and understand that pour patterns require lab confirmation.
- Differentiation: Shorten by giving three photos and one origin. Extend with the flashover challenge or a mock cross-examination of the ruling.
- Assessment focus: Reward correct origin location, the multiple-origins reasoning, and honest, confirmation-dependent language about accelerants.
Case Closed — For Now

You read a burned-out room like a page of text — apex by apex, char by char — and traced the flames all the way home, without ever striking a match. That careful, myth-free reasoning is exactly what modern fire investigation demands. Outstanding, investigators. Follow the evidence!