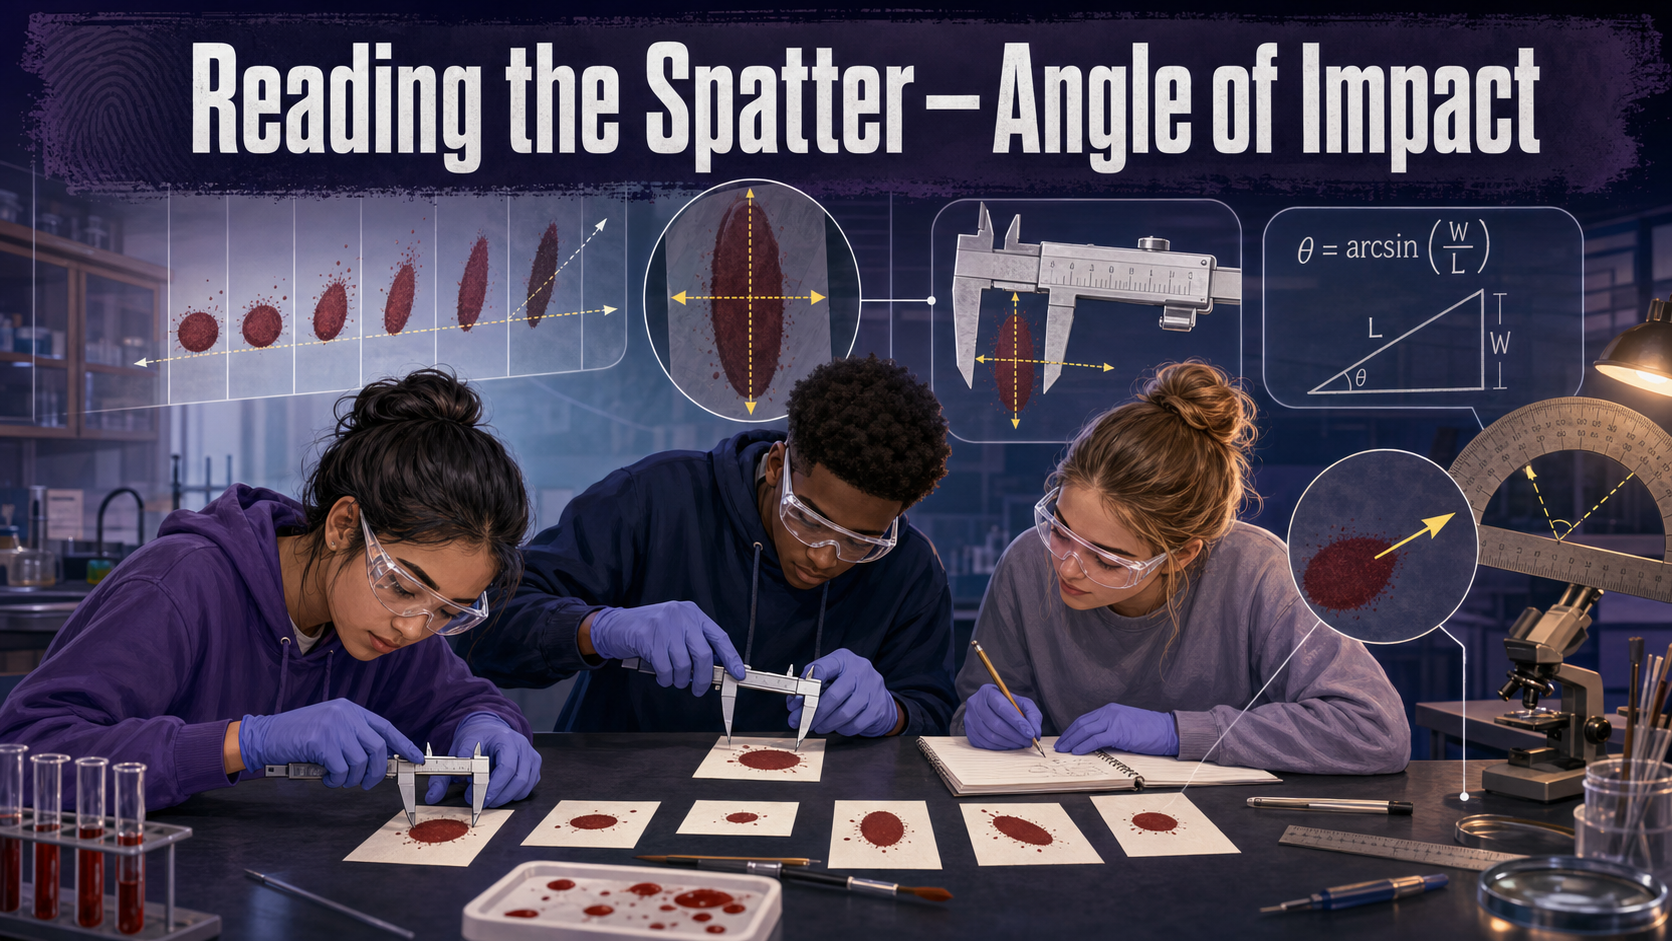
Reading the Spatter — Angle of Impact
Welcome, Investigators!

A blood drop is honest. The moment it hits a surface, its shape records the angle it arrived at — a circle from straight above, a long skinny teardrop from a shallow strike. Today you'll learn to read that shape backward into a number. One ruler, a little trig, and a drop of "blood" is all it takes. Follow the evidence!
The Case
An investigator photographs a wall at a scene and finds a row of elongated bloodstains. Detective Reyes wants to know the direction and steepness each drop was traveling — because those angles are the first step toward reconstructing where the victim was standing. But the photos have no protractor floating in mid-air. All Reyes has is the shape of each stain.
Your job: prove you can recover the angle of impact from a stain's dimensions alone. You'll drip a blood simulant onto paper set at angles you know, measure the stains, calculate each angle, and answer the question — how close does the width-to-length math get you to the true angle, and what makes it drift?
Learning Objectives
By the end of this investigation you will be able to:
- Describe how a blood drop's impact angle changes its stain shape.
- Measure the width and length of an elliptical bloodstain accurately.
- Calculate the angle of impact using the arcsin(width ÷ length) formula.
- Evaluate your measurement error by comparing calculated angles to known angles.
Quick Facts
| Lab type | 🔀 Combination (physical drip + virtual trig check) |
| Group size | 2–3 investigators |
| Time | 45–55 minutes |
| Cost | ≈ $12 per group (washable simulant) |
| Ties to | Ch 7 — Blood Drop Physics, Angle of Impact Formula, Surface Tension, Passive Bloodstains |
Materials
Per group (≈ $12):
- Blood simulant: water + red food coloring + a small splash of corn syrup (for viscosity)
- Disposable pipettes or medicine droppers
- White butcher paper or cardstock targets (several sheets)
- A cardboard incline you can set to 90°, 60°, 30°, and 15° (fold + tape, checked with a protractor)
- Protractor, metric ruler (mm), and a calculator with an arcsin (sin⁻¹) key
- Masking tape, paper towels, and a drip tray or newspaper underneath
Safety & Fair-Test Rules

- The simulant stains clothes — wear aprons and cover the bench. Mix a washable recipe (skip permanent dyes).
- Drop from the same height every time (measure it!). Height changes the drop's energy and can smear your stain. Consistency is the whole game.
- Let stains dry before measuring so you don't drag the edge and stretch your length reading.
Background: How a Drop Writes Down Its Angle
A blood drop in flight is a sphere held together by surface tension. When it strikes a surface head-on (90°), it spreads into a near-perfect circle — width and length are equal. Strike at a shallow angle instead, and the same drop smears into a long, narrow ellipse: the length grows while the width stays about the same. The shallower the angle, the longer and skinnier the stain.
That relationship is exact enough to write as a formula. For an elliptical stain:
sin(impact angle) = width ÷ length, so impact angle = arcsin(W ÷ L).
A stain 5 mm wide and 10 mm long gives arcsin(5 ÷ 10) = arcsin(0.5) = 30°. A round stain (W ≈ L) gives arcsin(1) = 90° — straight down. The math only needs two ruler measurements, which is exactly why analysts can pull angles off a photograph. Warm up on the simulator, then go make some stains.
Explore: Angle of Impact Calculator
Angle of Impact Calculator Interactive MicroSim
Type: microsim
sim-id: angle-of-impact-calculator
Library: p5.js
Status: Specified
Learning Objective: Calculate the angle of impact from a bloodstain's width and length using the arcsin ratio (Bloom Level 3 — Apply).
Feed the calculator different width and length values and watch the angle — and the stain shape — respond. Try to predict the angle before you read it. Once the pattern clicks, the real stains will make sense fast.
Procedure
Part 1 — Make stains at known angles.
- Set your incline to 90° (flat, drop lands from directly above) and tape a fresh target on it. Mark the drop height on a ruler so it never changes.
- Release one drop of simulant onto the target. Let it dry.
- Repeat for 60°, 30°, and 15°, each on its own labeled target. Make 2–3 stains per angle so you can pick the cleanest one.
Part 2 — Measure width and length.
- For the cleanest stain at each angle, measure the width (short axis) and length (long axis, tip to tail — do not include any thin spatter "tail") in millimeters.
- Record both in your data table.
Part 3 — Calculate and compare.
- For each stain compute W ÷ L, then arcsin of that value to get the calculated impact angle.
- Subtract to find the error = |calculated angle − true angle|. Use the simulator to double-check your arcsin arithmetic.
Data Collection
| True angle | Width W (mm) | Length L (mm) | W ÷ L | Calculated angle = arcsin(W÷L) | Error (°) |
|---|---|---|---|---|---|
| 90° | |||||
| 60° | |||||
| 30° | |||||
| 15° |
Analysis Questions
- Which true angle produced the most circular stain, and which produced the longest, narrowest one? Explain the trend in terms of the drop's path.
- At which angle was your calculated value closest to the true angle? At which was it worst? Propose a reason.
- The 15° stains are usually the hardest to measure accurately. Why does a very shallow angle make the length measurement unreliable?
- Your teammate measured length including the thin spatter tail. Would that make the calculated angle too big or too small? Show why using the formula.
- An analyst reads a real stain as W = 4 mm, L = 8 mm. What impact angle does the formula give, and what does that angle tell Detective Reyes about the drop's flight path?
Deliverable
Turn in your completed data table plus a short Angle-of-Impact Memo that reports your average error across the four angles, names the single largest source of that error, and states one change you'd make to measure more accurately next time. Attach your best stain from each angle.
Investigator Tip

Measure the length tip-to-tip of the solid ellipse only — the wispy tail that points in the drop's direction of travel is not part of the length. Including it stretches L, shrinks W ÷ L, and hands you an angle that's too shallow. Same mistake, every year.
Extension Challenge: Find the Missing Height
You measured stains but never recorded your drop height on one target. Using two stains from the same angle but different heights, describe what changes in the stain and what stays the same. Which stain property is tied to angle, and which is tied to energy/height? Design a quick test to separate the two.
Teacher Notes
Setup, timing, and grading (click to expand)
- Prep: Pre-build the four inclines and verify each with a protractor — "known" angles that are actually off will wreck the error analysis. Mix the simulant thin enough to drip cleanly (too much corn syrup and it won't release a round drop at 90°).
- Height control is everything. Give every group a fixed drop-height jig (a ruler taped upright works). Uncontrolled height is the top cause of smeared, unmeasurable stains.
- Differentiation: For a shorter lab, supply pre-made dried stains and go straight to measuring + calculating. For a challenge, hand groups a "mystery" stain and have them report the angle blind, then reveal it.
- Assessment focus: Reward correct use of arcsin (not just sin), consistent tip-to-tip length measurement, and an honest error discussion. Precision of reasoning beats a lucky number.
Case Closed — For Now

You just turned the shape of a stain into an angle — the exact skill that lets analysts reconstruct a flight path from a wall in a photograph. Keep those angles; in the next investigation you'll run strings back to find where the drops came from. Follow the evidence!