Blinking
A blink is the smallest piece of reflex your robot's face can show, and it is also the first lesson where the face reacts to you. Every earlier lesson drew a shape or ran an animation on a timer; this one waits — patiently, forever, in a loop — for a human finger to press a button, and only then closes both eyes and opens them again.
Let's make the face react
 A blink on command is the first time this face listens before it speaks. Every pixel tells a story!
Blink, Not Wink
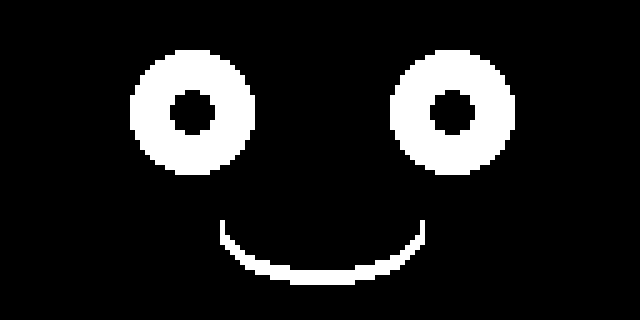
Here is the same face with both eyes open, ready to blink:
The Winking with a Smile lesson closed a single eye to make the face look playful and deliberate. A blink is almost the opposite:
- Both eyes close together. One eye closing reads as a wink; two eyes closing at the same instant reads as a blink — an automatic reflex, not a wink or a signal.
- It is fast and involuntary-looking. A wink can hold for a beat to land the joke. A blink should snap shut and pop back open so quickly that a person barely notices it happening, which is exactly what makes it feel natural instead of scripted.
Same Arc, Different Meaning
 The closed eye in this lesson is the exact same
 TOP_HALF arc trick from the wink lesson. What changes is how many eyes use it and how long they stay that way — proof that a small set of drawing tricks can carry a lot of different meaning.
Drawing Closed Eyes
An open eye is a filled white ellipse with a black pupil ellipse on top. A closed eye reuses
the quadrant-mask trick from the wink lesson: the top half of an ellipse(), drawn with the
mask TOP_HALF (a value of 3) instead of a full circle.
1 2 3 4 5 6 7 | |
The for offset in range(STROKE) loop draws the same arc three times, each one shifted down a
pixel, so the curve reads as a solid line instead of a faint single-pixel trace. This lesson
calls both eyes with this same function — that is the entire difference between a blink and a
wink in code.
Reading a Push Button
Every lesson so far has run on its own schedule, driven only by sleep(). A button changes
that: the program has to keep checking a pin's state and respond the instant a person presses
it.
A push button wired to a pull-up input reads 1 when nothing is touching it and drops to
0 the moment it is pressed, because pressing the button connects the pin straight to ground.
Pin.PULL_UP tells the microcontroller to hold that pin at 1 on its own, so you do not need
an extra resistor on the breadboard.
1 2 | |
Pressed Means 0, Not 1
 This trips up almost everyone the first time. With
 Pin.PULL_UP, button.value() reads 1 when the button is left alone and 0 when it is pressed — backwards from what most people guess.
Real buttons also bounce: the metal contacts inside can touch and separate several times in the first few milliseconds of a press, which a fast microcontroller can misread as several presses. The fix is a short pause, called a debounce, that lets the signal settle before you trust it:
1 2 3 4 5 | |
button_pressed() only returns True if the pin still reads 0 after that short pause —
real presses hold steady through 20 milliseconds of bounce, so this check quietly ignores the
noise.
One more detail matters: without extra code, holding the button down would trigger dozens of
blinks per second. wait_for_release() pauses the program until the pin goes back to 1,
so one press produces exactly one blink no matter how long a finger stays on the button.
1 2 3 | |
Sample Program Code
This program builds the face out of the same small functions as the wink lesson, then adds a
button check to the main loop. draw_face(True) closes both eyes; draw_face(False) opens
them again.
1 2 3 4 5 6 7 8 9 10 11 12 13 14 15 16 17 18 19 20 21 22 23 24 25 26 27 28 29 30 31 32 33 34 35 36 37 38 39 40 41 42 43 44 45 46 47 48 49 50 51 52 53 54 55 56 57 58 59 60 61 62 63 64 65 66 67 68 69 70 71 72 73 74 75 76 77 78 79 80 81 82 83 84 85 86 87 88 89 90 91 92 93 94 95 96 97 98 99 100 101 | |
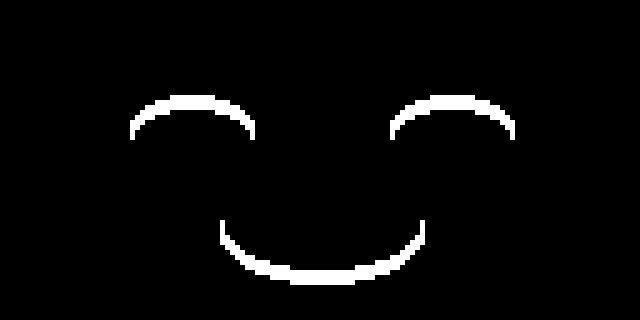
Here's what the display shows the instant a press is detected:
Keep the Main Loop Fast
 The final
 sleep(0.01) is deliberately tiny. A button check needs to run often enough that a press never slips through between two checks — a slow main loop is the most common reason a button "sometimes doesn't work."
Things to Try
- Make the blink slower. Change the
sleep(0.15)inblink_once()to0.6and watch a snappy blink turn into something closer to a sleepy droop. - Add a second button on a different pin that triggers a wink from the Winking with a Smile lesson instead of a blink, so one robot can do both expressions on demand.
- Count the presses. Add a counter variable that increases by one every time
blink_once()runs, and print it so you can see how many times the face has blinked. - Blink on its own too. Combine this button with a timer so the face blinks automatically every few seconds and still blinks early whenever the button is pressed — the way real eyes work.
- Chain it into an emotion. Trigger the "surprised" face from Emotion Types on the same button, so a press startles the robot instead of making it blink.
The face just heard you
 A pull-up pin, a debounce check, and a wait-for-release loop — that's all it takes to turn a button press into a face that reacts. Great expression!
References
- MicroPython Machine Module Documentation — the full
PinAPI, includingPin.INandPin.PULL_UP - MicroPython Framebuf Documentation — the full
ellipse()signature, including the quadrant mask parameter - Winking with a Smile — where the closed-eye arc and its quadrant mask were first introduced
- Basic Face Layouts — the eye, mouth, and face proportions this lesson builds on