Mode Switching
Two buttons and a list are all you need for a menu. Button A moves forward, button B moves back,
and the % (modulo) operator wraps the index around automatically so the list loops from the last
entry back to the first with no extra if checks.
This is a small lab with a big payoff: every menu in the rest of the kit is this exact pattern with a different list.
The Modulo Trick
1 2 | |
MicroPython's % returns a non-negative result for a positive divisor, so -1 % 5 is 4 — which
means going backward off the front of the list lands you neatly on the last entry. No special case
required.
| Expression | With len(MODES) == 5 |
|---|---|
(4 + 1) % 5 |
0 — wrapped forward |
(0 - 1) % 5 |
4 — wrapped back |
A List of (name, function) Pairs
The other idea in this lab is storing functions in a tuple alongside their names. A function is just a value in Python, so it can sit in a list exactly like a number can.
1 2 3 4 5 6 7 | |
This Table Grows Into Everything
 Five shapes today, seven emotions in a few labs, and eventually a whole table of numbers that describes my entire emotional range. The shape of the code never changes — only what is in the list.
The Mode Name Moves to the Big Font
Every position in this lab is the 1.2" kit's number times 1.5 — except the font, because bitmap
glyphs are fixed 8×16 and 16×32 shapes that don't get bigger just because the screen did. Left in
the small font, the mode name would cover a smaller fraction of this screen than it did on the
1.2" kit, so it moves up to the 16×32 font here — the same promotion this kit's face.label()
makes for emotion names:
1 | |
"Rectangle" is the longest mode name at 9 characters, which comes to 144 px in the big font —
comfortably inside the roughly 191 px the visible circle gives you at LABEL_Y. Unlike the
Expression Menu lab, where the label had to move off its naive scaled position to clear a raised
eyebrow, LABEL_Y here is simply 28 × 1.5 = 42, because none of these five demo shapes reach
that high on the screen. There's no face to protect, so the naive scale just works.
Sample Program Code
1 2 3 4 5 6 7 8 9 10 11 12 13 14 15 16 17 18 19 20 21 22 23 24 25 26 27 28 29 30 31 32 33 34 35 36 37 38 39 40 41 42 43 44 45 46 47 48 49 50 51 52 53 54 55 56 57 58 59 60 61 62 63 64 65 66 67 68 69 70 71 72 73 74 75 76 77 78 79 80 81 82 83 84 85 86 87 88 89 90 91 92 93 | |
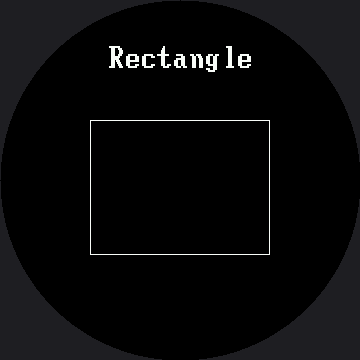
Here's the first mode, which is what you see before pressing anything:
When a Full Wipe Is Fine
Every mode here starts with display.fill(BLACK), and you can see it happen when you press a
button. After all the fuss about avoiding full wipes, why is that acceptable?
Because it happens once per press, not sixty times a second. Knowing when a full wipe is fine is exactly as useful as knowing when it is not:
| Situation | Full wipe? |
|---|---|
| A menu that changes when a human presses a button | Yes — a few times a minute is invisible |
| A demo reel changing every two seconds | Yes |
| An animation running at 30 frames per second | No — erase only the box that moved |
| A pupil sweeping back and forth | No |
Which of These Belongs on a Round Screen?
 Step through all five and ask yourself which ones look right and which look like mistakes. The rectangle and the triangle both have corners pointing at a bezel that has none. The ring looks like it was made for this screen, because it was.
Things to Try
- Add a sixth mode. Write the function, add one row to
MODES, and you are done — no changes to the loop at all. Try naming it "Checkerboard": at 12 characters, that's 192 px in the big font, just past the roughly 191 px the visible circle gives you atLABEL_Y— watch its first and last letters vanish under the bezel. - Reorder the list and confirm the menu order follows. Data, not code.
- Time a mode change with
ticks_ms(). Most of what you measure is the full wipe — 129,600 pixels here, 2.25× the 1.2" kit's 57,600 — and it is still comfortably fast enough for a button press. - Delete
wait_for_release()and hold button A down. You will fly through the whole menu several times a second, which is a useful thing to have seen once.
References
- Reading Two Buttons — the button-reading pattern this lab builds on
- The Expression Menu — the same code with seven emotions instead of five shapes
- A Face With a Memory — what happens when the menu gains a memory of where it has been
- Mode Switching on the 1.2" kit — the same lab where the mode name still fits in the small font